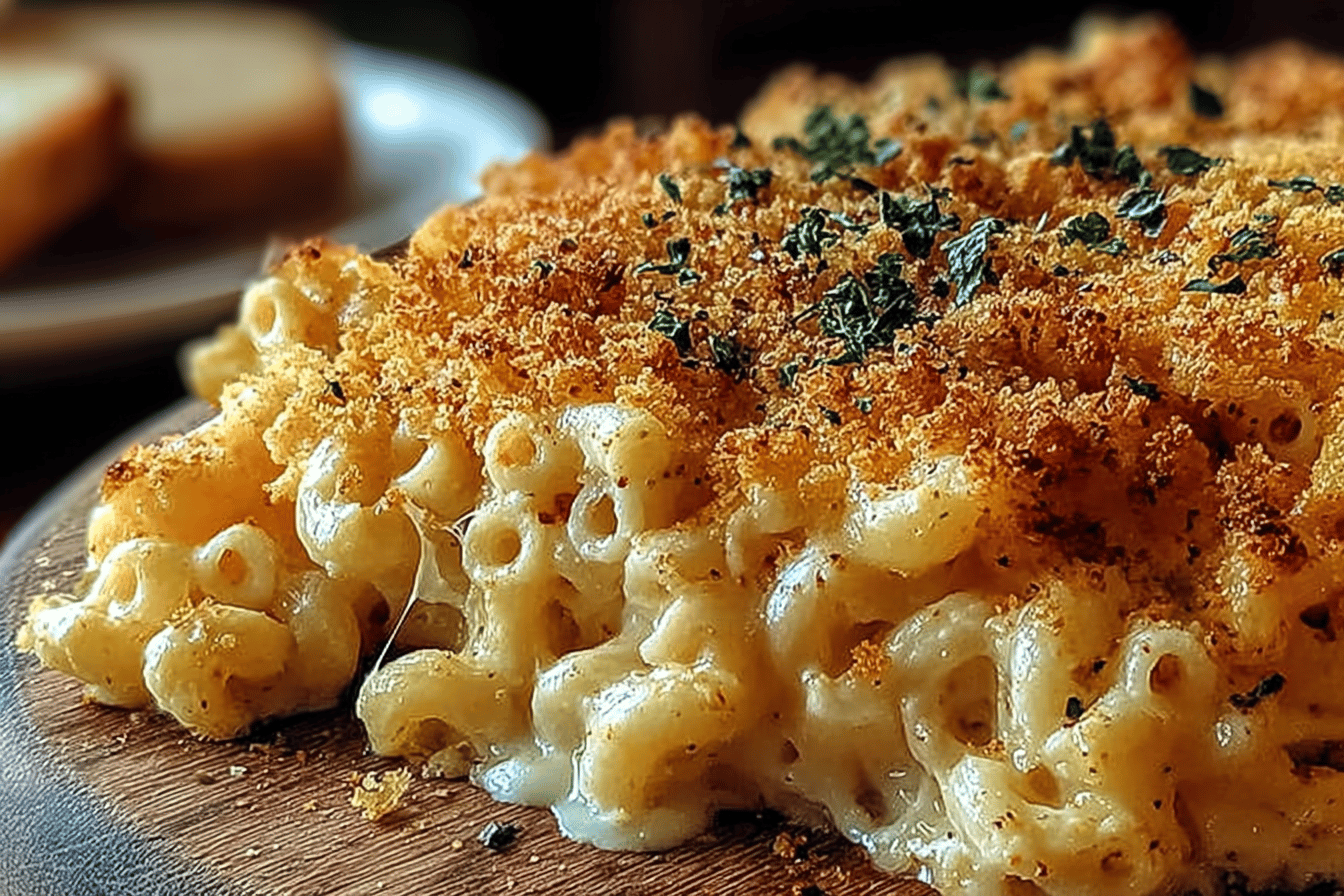
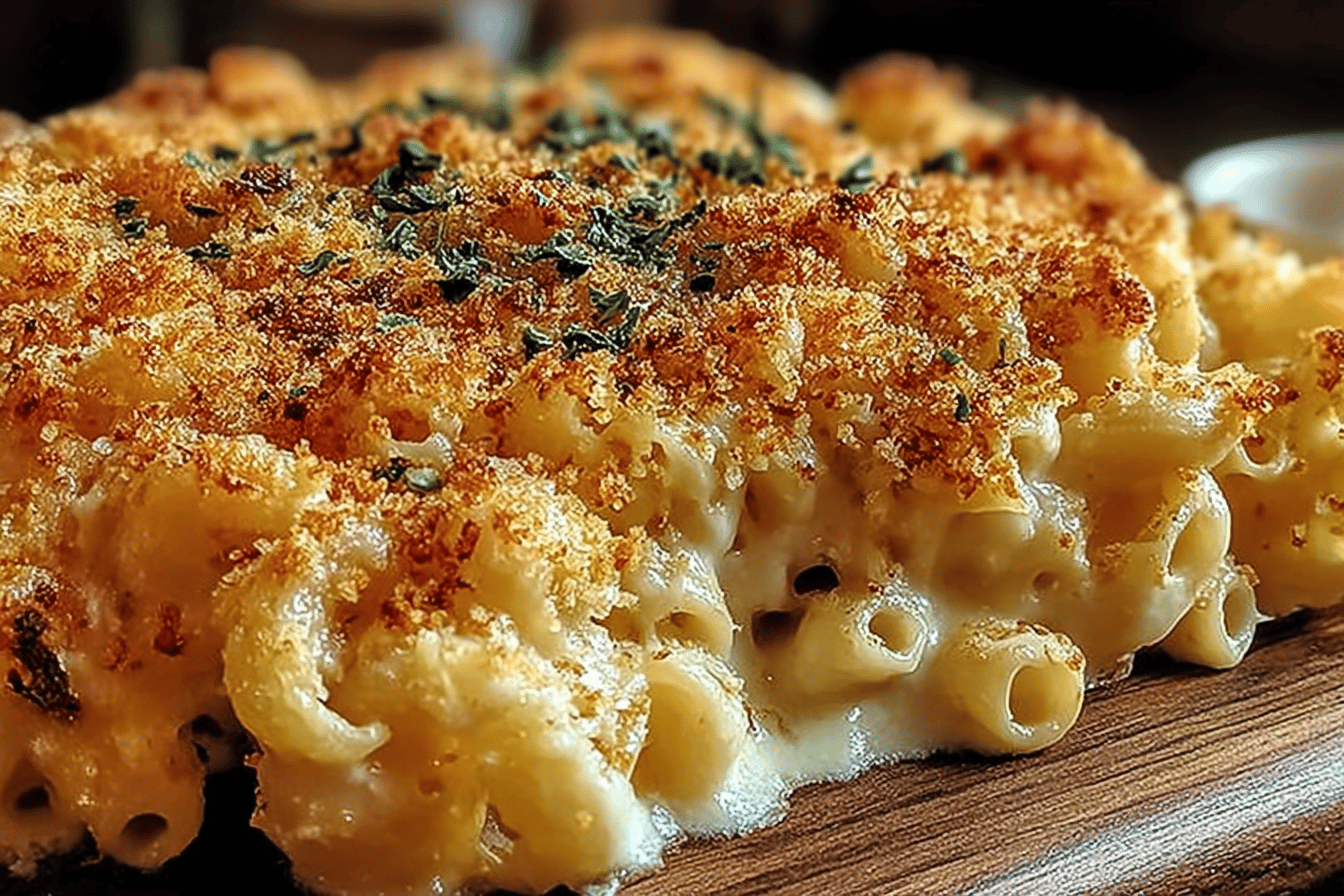
Baked Mac and Cheese
Introduction
Baked Mac and Cheese is one of those comforting dishes that never fails to satisfy. Creamy, cheesy, and baked to golden perfection, it makes for a fantastic side dish or even the star of a meal. Whether you’re preparing a cozy family dinner or impressing your guests at a potluck, this dish is sure to wow everyone around the table. With simple ingredients and easy steps, this recipe from Worldly Plate will elevate your mac and cheese game to the next level.
Detailed Ingredients with Measures
Elbow macaroni
1 pound
Butter
4 tablespoons
All-purpose flour
1/4 cup
Whole milk
3 cups
Heavy cream
1 cup
Shredded sharp cheddar cheese
3 cups
Shredded mozzarella cheese
2 cups
Seasoned breadcrumbs
1/2 cup
Salt
1 teaspoon
Black pepper
1/2 teaspoon
Optional: Paprika
1/2 teaspoon
Prep Time
The preparation time for this baked mac and cheese recipe is around 15 minutes. This includes cooking the macaroni, shredding the cheese, preparing the roux, and combining all the ingredients for the main dish. It’s quick and simple enough for even beginner cooks to tackle without any hassle.
Cook Time, Total Time, Yield
The cook time for the baked mac and cheese is approximately 25 minutes. This includes the time spent in the oven for the dish to bake to bubbly, cheesy perfection with a golden crust.
The total time for preparing and cooking the dish is about 40 minutes, making it a convenient option for both weeknight dinners and special occasions.
The yield of this recipe is generous, serving approximately 6 to 8 people, depending on portion size. Whether you’re feeding a family or hosting friends, there’ll be plenty to go around—though you might still end up with an empty dish, it’s just that good!
“`html
Detailed Directions and Instructions
Step 1: Preheat the oven
Preheat your oven to 375°F (190°C) to ensure it is hot and ready when your mac and cheese is assembled.
Step 2: Cook the pasta
Bring a large pot of salted water to a boil. Add your pasta of choice and cook it until al dente, following the package instructions. Once done, drain the pasta and set it aside.
Step 3: Create the roux
In a large saucepan, melt butter over medium heat. Once melted, sprinkle in the flour and whisk continuously to form a paste. Cook the roux for 1 to 2 minutes to eliminate the raw flour taste.
Step 4: Add the milk
Gradually pour in milk while whisking constantly to keep the mixture smooth. Simmer the sauce for a few minutes, stirring frequently, until it begins to thicken.
Step 5: Incorporate the cheese
Reduce the heat to low, then slowly add in shredded cheeses (reserve some for topping) while stirring gently. Continue to stir until the cheese has melted completely and the sauce is smooth and creamy.
Step 6: Season the sauce
Season the cheese sauce with salt, pepper, and any additional spices of your preference (such as garlic powder or paprika). Adjust the flavors to your liking by tasting the sauce.
Step 7: Combine pasta and cheese sauce
Add the cooked pasta to the cheese sauce and stir well to coat every piece of pasta evenly in the cheesy mixture.
Step 8: Transfer to baking dish
Grease a baking dish lightly with butter or non-stick spray. Pour the macaroni and cheese mixture into the prepared dish, spreading it out evenly.
Step 9: Add the topping
Sprinkle the reserved shredded cheese generously over the macaroni mixture. You may also add a breadcrumb topping for extra texture if desired.
Step 10: Bake the mac and cheese
Place the baking dish in the preheated oven. Bake for 20-25 minutes, or until the top is golden and bubbly.
Step 11: Let it rest before serving
Remove the baking dish from the oven and allow the baked mac and cheese to rest for about 5 minutes. This will help it set and make it easier to serve.
Notes
Note 1: Cheese selection
For the best flavor, use a combination of cheeses such as sharp cheddar, gouda, and mozzarella. Avoid pre-shredded cheese as it may contain anti-caking agents that can impact melting.
Note 2: Pasta type
Choose short pasta shapes like elbow macaroni, cavatappi, or shells, as they hold the sauce well.
Note 3: Make it ahead
You can assemble the mac and cheese ahead of time. Store it in the refrigerator, covered, and bake it when ready to serve. Note that you may need to increase the baking time if it’s cold.
Note 4: Reheating
To reheat leftovers, cover the dish with aluminum foil and bake at 350°F (175°C) until warmed through. You can also add a splash of milk to restore creaminess.
Note 5: Add-ins
Feel free to customize this dish by adding cooked bacon, sautéed onions, or vegetables like broccoli or peas to the pasta and cheese mixture before baking.
“`
Cook Techniques
Grating Your Cheese
Instead of using pre-shredded cheese, grate your cheese from a block. Freshly grated cheese melts more evenly and provides a creamier texture.
Creating a Roux
For a rich and creamy mac and cheese, start with a roux. This mixture of butter and flour is cooked together and serves as the base for your cheese sauce.
Slowly Adding Milk
When making your cheese sauce, pour in the milk gradually while stirring constantly. This step ensures a lump-free, smooth sauce.
Baking for a Gooey Center
Bake the dish to achieve a perfectly set center while maintaining a gooey, cheesy consistency.
Adding a Crispy Topping
For added texture, sprinkle bread crumbs or additional cheese on top before baking.
FAQ
What type of cheese should I use?
A combination of sharp cheddar and mozzarella works best for flavor and meltability.
Can I make this dish ahead of time?
Yes! Prepare and assemble the dish, then refrigerate it. Bake it when you’re ready to serve.
How can I prevent my cheese sauce from curdling?
Use low heat when melting the cheese and avoid overheating. Gradually mix in the cheese to the roux and milk mixture.
Can I freeze leftover mac and cheese?
Absolutely. Store leftovers in an airtight container and freeze for up to 2 months. Thaw and reheat when needed.
How long should I bake the mac and cheese?
Typically, 20-25 minutes at 350°F is enough to achieve a golden-brown topping and creamy center. Avoid overbaking to prevent dryness.
Conclusion
The baked mac and cheese recipe promises a comforting, creamy, and savory dish perfect for any occasion. Its golden-brown crust and gooey interior make it a favorite for gatherings or weeknight dinners. This dish brings the perfect combination of hearty, cheesy warmth to the table, leaving everyone delighted with its rich flavors.
More recipes suggestions and combination
Classic Garlic Bread
Pair your baked mac and cheese with the crunch of classic garlic bread for a well-rounded and satisfying meal. The crispy edges and garlicky flavor perfectly complement the creamy pasta.
Roasted Vegetables
Balance the richness of mac and cheese by serving it alongside roasted vegetables like broccoli, carrots, or Brussels sprouts. This healthy addition brings texture and brightness to your plate.
Barbecue Chicken
Combine the smokiness of barbecue chicken with the cheesy goodness of mac and cheese for a savory twist. This combination adds protein and rich flavors to the meal.
Homemade Tomato Soup
For a comforting dinner idea, pair the baked mac and cheese with a bowl of homemade creamy tomato soup. Its acidity and sweetness work perfectly with the cheesy pasta.
Crispy Caesar Salad
Add a fresh touch by serving your mac and cheese with a crisp Caesar salad. The tangy dressing and crunchy croutons provide a delightful contrast to the creamy pasta.
Spicy Jalapeno Toppings
If you want to add some heat, try sprinkling sliced jalapenos or crushed chili flakes over the baked mac and cheese. This small addition brings a spicy kick to the dish.
Grilled Sausages
Grilled sausages make an excellent side dish, adding a smoky and meaty flavor that pairs beautifully with the creamy mac and cheese.
Coleslaw
For a satisfying crunch to complement the soft texture of mac and cheese, serve it with a side of creamy coleslaw. The tangy and sweet notes create a refreshing balance.