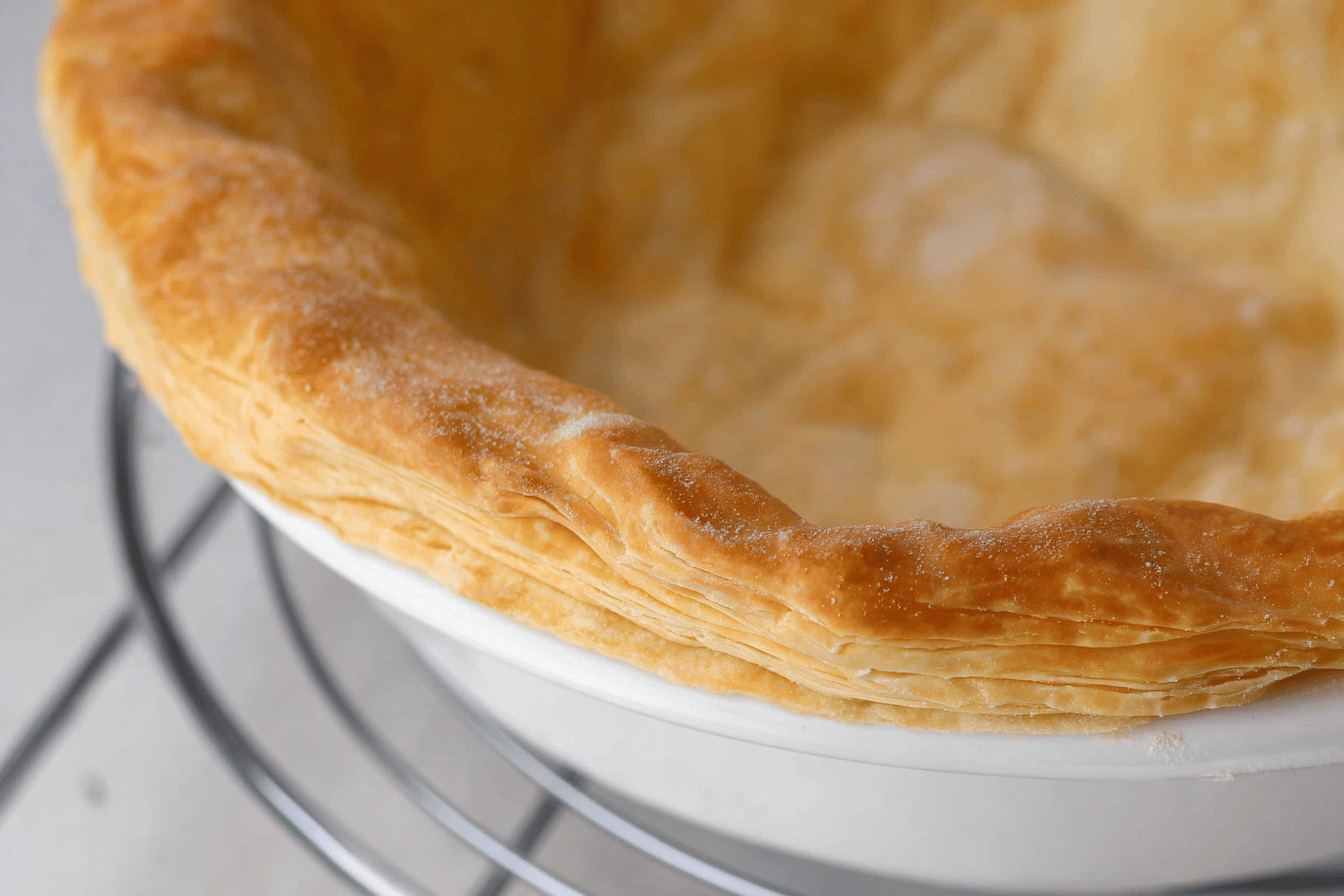
Flaky Pie Crust
Introduction
Introduction
Flaky pie crust is a staple in baking and one of the most versatile recipes you can master. Whether you’re making sweet desserts or savory pies, having a reliable and easy-to-follow pie crust recipe is essential. Spatula Desserts provides an approachable guide to creating the flakiest, tastiest pie crusts that can elevate your baking to new heights.
Detailed Ingredients with measures
Ingredients
To create this flaky pie crust, you’ll need:
– All-purpose flour: 250g or about 2 cups
– Unsalted butter: 150g or around 1 1/3 sticks, very cold and cut into cubes
– Salt: 1/2 teaspoon
– Granulated sugar: 1 tablespoon (optional, for sweet pies)
– Ice-cold water: About 6-8 tablespoons, as needed
Why these ingredients matter
The right balance of ingredients plays a significant role in achieving the flakiness and flavor of the crust. Cold, cubed butter is crucial for creating those flaky layers, and ice-cold water ensures the dough comes together without overworking the gluten.
Prep Time
Efficient preparation
Prep time for this flaky pie crust recipe is approximately 15 minutes. However, the key to a good crust is allowing it to chill adequately before working with it. This ensures the butter stays cold and maintains the desired texture.
Cook Time, Total Time, Yield
Cook and total time
Cook time will depend on the specific recipe you’re making, as this pie crust serves as a base for various pies. Typically, blind baking takes about 20-25 minutes. Including cooling and prep, total time may vary between 1-2 hours depending on the pie filling and purpose.
Yield
This recipe yields one 9-inch pie crust, perfect for a single-crust pie. For a double-crust pie, simply double the recipe. Keep in mind that chilling times will remain the same.
Final thoughts
Mastering a flaky pie crust doesn’t have to be intimidating. With high-quality ingredients, mindful preparation, and a little patience, you’ll be creating perfect pie crusts in no time. Whether you’re baking for a special occasion or just satisfying a craving, this recipe from Spatula Desserts ensures consistent, delicious results. Happy baking!
Detailed Directions and Instructions
Step 1: Chill the Butter and Water
Place the butter in the freezer for about 15 minutes before starting the recipe. It’s essential to have cold butter for a flaky crust. Similarly, chill a glass of water in the refrigerator.
Step 2: Mix the Dry Ingredients
In a large mixing bowl, combine flour, sugar, and salt. Mix well to ensure the dry ingredients are evenly distributed.
Step 3: Cut in the Butter
Grate or chop the chilled butter into small pieces and add to the dry ingredients. Using a pastry cutter or your fingertips, mix the butter into the flour until the texture resembles coarse crumbs. Small butter chunks should still be visible.
Step 4: Gradually Add Cold Water
Add 1 tablespoon of the chilled water at a time, mixing gently with a spatula or fork after each addition. Continue until the dough begins to clump together but is not wet or sticky. Be careful not to overwork the dough.
Step 5: Form the Dough
Turn the dough out onto a lightly floured surface and bring it together into a disk using your hands. Avoid kneading or overhandling the dough. Wrap the disk tightly in plastic wrap.
Step 6: Chill the Dough
Place the wrapped dough in the refrigerator and chill for at least 2 hours or overnight. This helps to relax the gluten and ensures a tender crust.
Step 7: Roll Out the Dough
Once chilled, roll out the dough on a floured surface. Start from the center and roll outward, turning the dough often to maintain an even thickness and prevent sticking. Roll to your desired thickness and size, depending on your pie pan.
Step 8: Transfer to Pie Pan
Carefully transfer the dough to your pie pan by rolling it over your rolling pin. Unroll it gently over the pan, ensuring it lies evenly over the bottom and sides. Trim any excess dough hanging over the edges.
Step 9: Crimp or Decorate Edges
Crimp or decoratively pattern the edges of the crust as desired. Use your fingers, a fork, or special tools for decoration.
Step 10: Chill Again
Place the prepared pie crust back in the refrigerator for about 30 minutes to solidify the butter and prevent shrinking during baking.
Step 11: Pre-Bake or Fill
If pre-baking, dock the crust by pricking the bottom with a fork and use pie weights or dried beans to keep it from puffing up. Follow your recipe’s instructions for baking time and temperature. Otherwise, add your desired filling and proceed with your recipe.
Notes
Use High-Quality Butter
Ensure you use high-fat unsalted butter for better flavor and flakiness.
Work Quickly
To maintain a cold environment, work on the dough quickly and in a cool kitchen area.
Don’t Overwork the Dough
Avoid overmixing or overkneading the dough as this can lead to a tough crust.
Refrigeration is Key
Chilling the dough at every step is essential for a flaky crust. Do not skip chilling.
Flour Your Surface
Always flour your work surface and rolling pin lightly to prevent sticking.
Control the Water
Add water gradually to prevent the dough from becoming too wet, as this will make it difficult to work with.
Test the Dough’s Readiness
When adding water, the dough should hold together when pinched but not feel sticky.
Customize for Sweet or Savory Filling
Adjust the sugar amount depending on whether your pie filling is sweet or savory.
Freeze for Future Use
You can freeze the prepared dough for up to 3 months. Wrap it tightly in plastic wrap and place in a freezer bag.
Cook Techniques
Keep Ingredients Cold
Ensuring that all your ingredients are cold—especially butter—is crucial for achieving a flaky pie crust. Cold butter creates steam during baking, which results in a beautifully layered texture.
Use Pastry Cutter or Food Processor
Instead of using your hands, rely on a pastry cutter or food processor to combine the butter and flour. This reduces the chance of warming up the butter with body heat.
Mind the Water Temperature
Using ice-cold water to bring the dough together will keep the butter from melting and ensure the dough remains cohesive but not sticky.
Rest the Dough
Allow the dough to rest in the refrigerator for at least an hour before rolling it out. This step relaxes the gluten and makes the dough easier to work with.
Use Minimal Flour for Rolling
When rolling out the dough, use only a small amount of flour to prevent sticking. Too much flour can make the crust dense.
Roll from the Center
Always roll out the dough from the center towards the edges. This ensures an even thickness throughout.
Chill Before Baking
Once the dough is rolled and placed in the pie dish, chill it again to maintain the structure and prevent shrinking during baking.
Blind Baking (Optional)
For pies that require a pre-baked crust, use parchment paper and pie weights to prevent bubbling. Blind baking ensures the bottom remains firm and doesn’t become soggy.
Avoid Overworking the Dough
Handle the dough minimally to prevent activating too much gluten, which can make the crust tough instead of tender and flaky.
FAQ
Why is my pie crust not flaky?
This typically happens if the butter gets too warm or if the dough is overworked. Make sure to use cold butter and avoid handling the dough excessively.
How do I prevent my pie crust from shrinking?
Chilling the dough both after rolling and once placed in the pie dish can help prevent shrinking during baking.
Can I use salted butter for the pie crust?
While it’s possible, it’s better to use unsalted butter so you can control the amount of salt in the recipe.
How do I fix dough that’s too crumbly?
If the dough is too dry and crumbly, add a teaspoon of ice-cold water at a time until it comes together. Be careful not to add too much.
Should I grease the pie pan?
It’s not usually necessary to grease the pan, as the high butter content in the dough prevents sticking.
Can I freeze pie crust?
Yes, pie crust freezes beautifully. Wrap it tightly in plastic wrap and store in a freezer-safe bag for up to three months.
Why does my pie crust crack when rolling?
Cracking usually happens when the dough is too cold. Let it sit at room temperature for a few minutes before rolling.
What is blind baking, and when is it necessary?
Blind baking involves pre-baking the crust with pie weights to prevent puffing. It’s useful for pies with fillings that don’t require baking, like custards or creams.
How can I make my crust golden brown?
Brushing the crust with an egg wash (beaten egg mixed with water or milk) before baking will give it a golden color and glossy finish.
Can gluten-free flour be used for pie crust?
Yes, but the texture and handling of the dough may vary. Consider using a gluten-free flour blend designed for baking.
“`html
Conclusion
A perfectly flaky pie crust is the foundation of countless delectable desserts. Understanding and mastering the techniques for creating this pie crust will elevate your baking skills and ensure your dishes are both visually stunning and deliciously mouthwatering. Experimenting with various fillings and combinations can also make every pie unique and enjoyable for every occasion.
More recipes suggestions and combination
Classic Apple Pie
The timeless choice, filled with spiced apples and a touch of cinnamon, is a perfect complement to this flaky crust.
Rich Chocolate Tart
Transform the dough into a sturdy base for a creamy, decadent chocolate tart for chocoholics.
Cheesy Quiche
Turn the crust into a savory option by using it as a base for quiches filled with eggs, cheese, and vegetables.
Lemon Meringue Pie
Pair the flaky crust with zesty lemon curd and a fluffy meringue topping for a refreshing and tangy dessert.
Rustic Berry Galette
Go rustic with a galette; simply fold the crust around mixed berries for a visually stunning yet simple treat.
Pumpkin Pie
Celebrate the festive season with a creamy and spiced pumpkin filling in your homemade crust.
Peach Cobbler Pie
Combine the buttery flaky dough with fresh peaches for a classic summer dessert.
Nutty Pecan Pie
Create an irresistible filling of pecans and rich, buttery caramel for this beloved classic.
“`