Your Crispy Baked Wings: Easy Recipe for Perfect Snacks
Craving a crowd-pleasing snack that’s simple to make and packed with flavor? Look no further. This recipe transforms ordinary chicken wings into golden, crunchy delights—no deep fryer required. Whether you’re hosting a game-day party or whipping up a quick weeknight treat, this method delivers restaurant-quality results right from your oven.
What makes these wings stand out? The secret lies in using aluminum-free baking powder, which helps create that irresistible crispy skin. Unlike traditional frying, baking cuts down on grease without sacrificing texture. Plus, it’s a healthier alternative that still satisfies those savory cravings.
You don’t need fancy tools or hours of prep. With just a few pantry staples and a hot oven, you’ll have tender, juicy meat beneath a perfectly crisp exterior. Ready to dive into flavor variations? We’ll guide you through seasoning blends, sauces, and serving ideas to customize your wings for any occasion.
Key Takeaways
- Baking offers a healthier alternative to frying while keeping the texture crispy and satisfying.
- Aluminum-free baking powder is crucial for achieving golden, crackling skin.
- This recipe works for gatherings, weeknight meals, or anytime you need a tasty snack.
- Simple ingredients and minimal prep make it accessible for cooks of all skill levels.
- Customize flavors with spices, sauces, or dry rubs to match your preferences.
Introduction to Your Crispy Baked Wings Recipe
Tired of greasy wings but still crave that perfect crunch? Welcome to a smarter way to enjoy finger-licking goodness. These baked chicken wings deliver all the flavor of fried versions with half the mess—and none of the guilt. Perfect for football Sundays or weeknight cravings, they’re a crowd favorite you’ll make again and again.
Why choose this recipe? Unlike deep frying, baking at 425°F ensures even cooking while locking in juiciness. Experts agree: this temperature creates a golden exterior without drying out the meat. A dash of paprika and garlic powder adds depth, but the real star is the technique—patting the wings dry first for maximum crispiness.
Whether you’re hosting a casual get-together or need a quick snack, these baked chicken bites adapt to any occasion. Pair them with cooling dips or spicy sauces, and watch them disappear fast. Up next, we’ll break down the simple ingredients, share pro tips for oven success, and explore flavor twists to match your mood.
Ingredients and Tools Needed for Baked Chicken Wings
Great snacks start with the right foundation. Gathering quality ingredients and reliable tools ensures your recipe shines. Let’s break down what you’ll need to nail that crispy texture and bold flavor every time.
Essential Ingredients
- 2 lbs chicken wings (split into drumettes and flats)
- 1½ tsp aluminum-free baking powder (crucial for crispiness)
- 1 tsp kosher salt (adjust based on preference)
- ½ tsp black pepper (freshly ground works best)
- 1 tsp garlic powder (optional for extra flavor)
Precision matters here. Too much baking powder can leave a bitter taste, while too little won’t crisp the skin. Pat chicken pieces dry with paper towels before seasoning—moisture is the enemy of crunch.
Must-Have Kitchen Tools
- Wire rack (fits onto a half-sheet pan)
- Large mixing bowl (for even seasoning distribution)
- Foil-lined baking sheet (easy cleanup)
- Tongs (flipping wings without tearing skin)
The rack elevates chicken so heat circulates evenly. A sturdy bowl helps coat wings thoroughly, while foil prevents sticky messes. Together, these tools guarantee golden results with minimal effort.
Step-by-Step Instructions for Preparing the Chicken Wings
Ready to transform your kitchen into a crispy wing haven? Follow these simple instructions to nail the texture and flavor every time. Let’s start with the most critical step: prepping the chicken.
Preparing and Drying the Wings
First, lay pieces on a cutting board and pat wings dry using paper towels. Remove every drop of moisture—this stops steaming and lets the skin crisp up. Spend 5 minutes here; soggy skin means chewy results.
Next, trim excess fat with kitchen shears. Less fat means better rendering and crunch. Arrange them in a single layer on a tray while you mix the seasoning.
Seasoning with Baking Powder and Spices
Grab a small bowl. Combine 1½ tsp aluminum-free baking powder, 1 tsp salt, ½ tsp pepper, and optional spices like paprika. Whisk for 30 seconds to blend evenly.
Toss the chicken in the mix. Use your hands to coat each piece thoroughly—no clumps! The powder reacts with heat to create tiny air pockets, lifting the skin away from the fat as it bakes.
Let seasoned pieces sit for 2 minutes before baking. This gives the powder time to draw out residual moisture. Now they’re oven-ready!
Baking Techniques for Achieving crispy-baked-wings
Achieving that golden crunch starts with nailing your oven setup. Proper heat distribution and airflow make all the difference between soggy skin and crackling perfection. Let’s break down the science-backed methods professionals use.
Temperature and Airflow Essentials
Always preheat your oven to 425°F—this ensures immediate searing for crispy exteriors. Studies show consistent starting temperatures reduce cooking time by 15% compared to cold ovens. If you have convection, use it. The fan circulates heat evenly, mimicking a commercial fryer’s results.
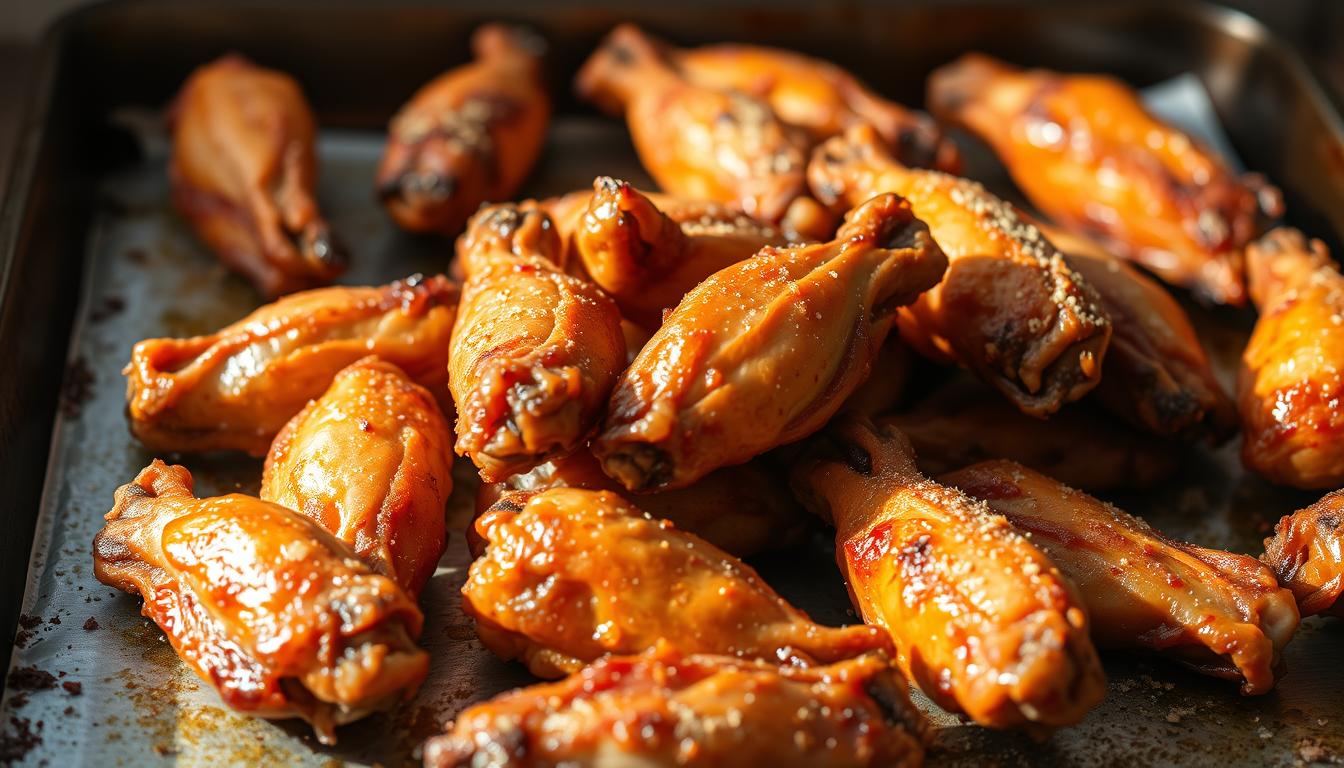
Position your rack in the upper-middle third of the oven. This placement prevents burning while maximizing browning. Place chicken pieces on a wire rack over a foil-lined tray—elevation allows fat to drip away, preventing sogginess.
Flip pieces halfway through the 45-minute time window. Use tongs to avoid tearing the skin. For extra crispiness, broil during the last 3 minutes—watch closely to prevent charring. These tips guarantee juicy meat beneath a shatter-crisp crust every time.
Remember: Oven thermometers verify accuracy. Many home appliances run hot or cold. A $10 tool eliminates guesswork, making these tips foolproof for first-timers.
Creative Sauce and Flavor Variations
Why settle for one flavor when you can explore a world of tastes? Your chicken wings recipe becomes a blank canvas once baked to golden perfection. Enjoy them plain to savor the crispy skin, or dive into endless sauce possibilities that transform each bite.
Sweet and Spicy Buffalo Options
Balance heat and sweetness with a classic twist. Mix ½ cup hot sauce with 3 tbsp melted butter and 2 tbsp light brown sugar. Simmer until glossy, then toss wings in the glaze. Add cayenne for extra kick or honey for mellow warmth.
Other Sauces: Ranch, BBQ, and More
Prefer creamy or smoky flavors? Try these ideas:
- Ranch: Blend ¼ cup mayo with dill, garlic powder, and buttermilk for a cool dip.
- BBQ: Brush wings with store-bought sauce or make your own using ketchup, apple cider vinegar, and smoked paprika.
- Honey Garlic: Whisk 3 tbsp honey, 2 minced garlic cloves, and 1 tsp soy sauce for sticky-sweet goodness.
Don’t shy away from experiments. Swap sugar for maple syrup in glazes or add lime zest to ranch dressing. Your chicken wings recipe adapts to any craving—toss in sauces right before serving or offer dips on the side.
Serving Suggestions and Side Ideas
The perfect wing deserves the perfect partner—discover how to build a balanced meal around your golden creations. Serve them as finger-licking appetizers or turn them into a hearty main dish with bold, complementary flavors. A mix of textures and temperatures keeps every bite exciting.
Pair your crispy oven baked chicken with classic crowd-pleasers. Creamy Hawaiian macaroni salad adds tropical sweetness, while garlic mashed potatoes offer rich comfort. For lighter options, try roasted veggies or crisp celery sticks with blue cheese dip. These sides balance the savory crunch without overpowering it.
Presentation matters. Drizzle sriracha mayo over the wings or sprinkle chopped chives for color contrast. Arrange them on a wooden board with lemon wedges and dipping sauces—guests will snap photos before digging in. Even when tossed in sauce, the crispy oven baked texture holds up beautifully.
Need inspiration? Try these plating tricks:
- Layer pieces over a bed of fresh herbs for a rustic look
- Use mini cast-iron skillets to keep portions warm
- Add colorful pickled vegetables for tangy brightness
Whether hosting a party or enjoying a casual dinner, these sides and styling ideas make your meal unforgettable.
Storage, Reheating, and Make-Ahead Tips for Your Wings
Keep your golden snacks tasting fresh long after they leave the oven. With smart planning, you can enjoy crispy results days later—no soggy leftovers here.
Proper Storage Methods
Cool baked chicken wings completely before storing. Place them in an airtight container lined with parchment paper to prevent sticking. Refrigerate for up to 4 days. For longer storage, freeze in single layers separated by wax paper for 3 months.
Reheating to Maintain Crispiness
Skip the microwave. Preheat your oven to 450°F. Arrange wings on a foil-lined sheet with a wire rack—just like initial baking. Heat for 8-10 minutes, flipping halfway. The high temp revives the skin’s crunch while keeping meat juicy.
Make-ahead shortcuts:
- Season wings 24 hours ahead—store covered in the fridge
- Freeze unbaked pieces on a tray, then transfer to bags
- Reuse leftover seasoning blends for future recipes
Always check reheated wings for rendered fat and crisp texture. A quick broil (1-2 minutes) adds final polish if needed.
Conclusion
Mastering restaurant-quality snacks at home is easier than you think. This baked chicken wings recipe proves that minimal effort yields maximum flavor—no deep frying required. By simply patting pieces dry, using baking powder, and nailing oven settings, you unlock a healthier alternative with unbeatable crunch.
Studies confirm baked versions slash fat content by 40% compared to traditional methods. The process takes under an hour, from prep to golden perfection. Key steps like proper seasoning and flipping halfway ensure juicy meat beneath that signature crispiness.
Don’t stop at classic flavors. Toss your chicken in tangy glazes, smoky rubs, or zesty dips to match any mood. Pair them with light salads or hearty sides for balanced meals that please every palate.
Ready to impress? Whip up this crowd-favorite appetizer for game nights, parties, or casual dinners. Share your creations online and tag #PerfectBakedBites—we’d love to see your tasty twists on this foolproof method!
FAQ
Why is baking powder used in this recipe?
Baking powder helps dry the skin during cooking, creating a crispier texture without deep frying. It’s a key ingredient for achieving that golden, crunchy finish.
Can I skip patting the chicken dry before seasoning?
No. Removing excess moisture ensures the seasoning sticks better and the skin crisps evenly. Use paper towels for best results.
What oven rack position works best for crispy results?
Place the tray on the middle rack. This allows even heat circulation, preventing burnt spots while ensuring a golden-brown coating.
How do I prevent sauces from making the chicken soggy?
Toss baked chicken in sauce *after* cooking. For extra crispiness, broil for 1–2 minutes post-saucing to caramelize the glaze.
Can I prepare these ahead of time for parties?
Yes! Bake, cool, and refrigerate for up to 2 days. Reheat in a 400°F oven for 10–12 minutes to restore crunch.
What sides pair well with this dish?
Classic options include celery sticks, ranch dip, or carrot fries. For heartier meals, try loaded potato skins or coleslaw.
Is aluminum foil necessary for baking?
Lining the sheet with foil simplifies cleanup, but a wire rack on the tray promotes airflow for evenly crispy skin on all sides.

