Spicy Pickled Okra Recipe
Introduction
Spicy Pickled Okra to Spice Up Your Pantry
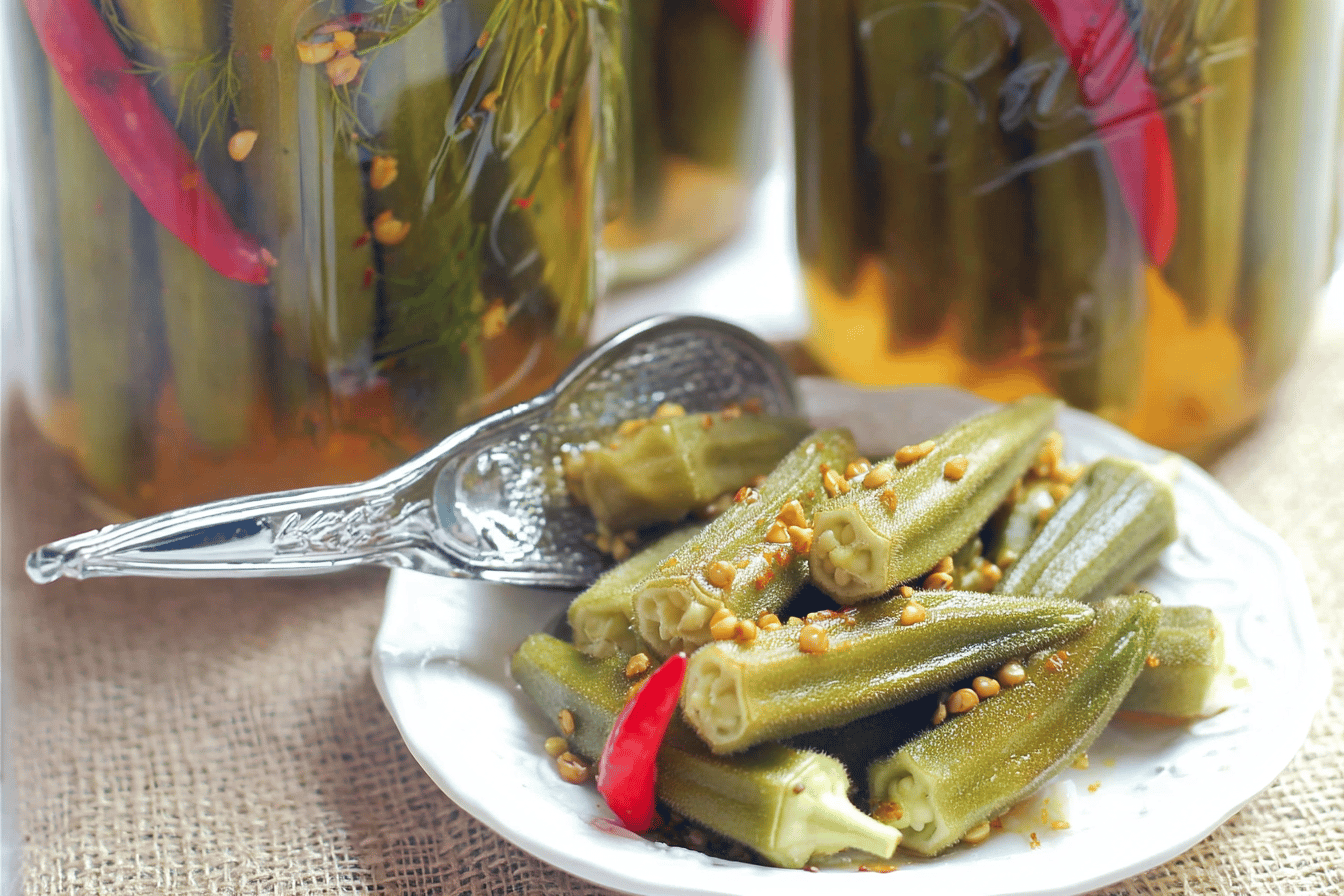
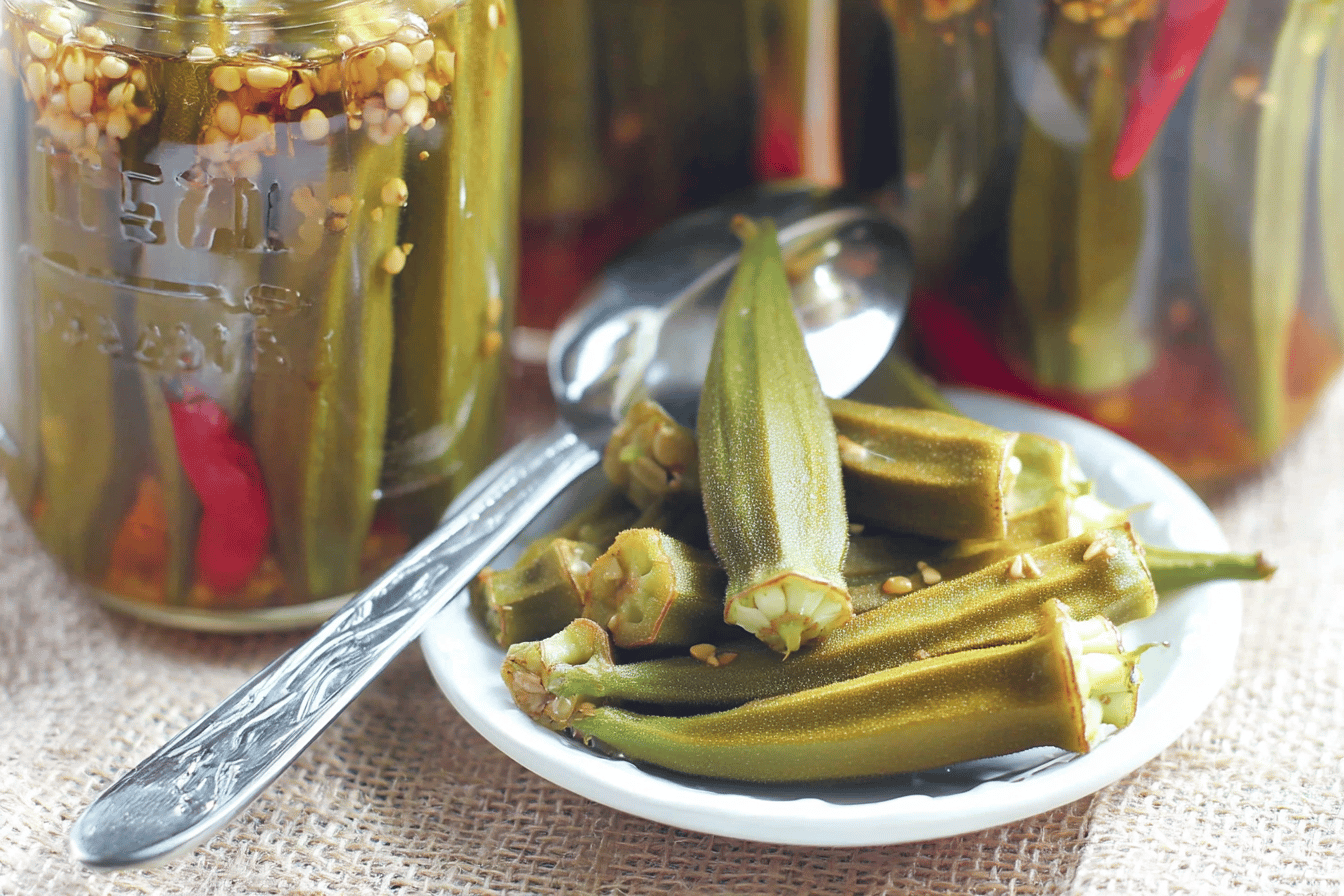
Spicy pickled okra is an ultimate Southern delicacy, blending the fresh crunchiness of okra with a vinegar-based brine infused with spices. Perfect as a snack, appetizer, or even a garnish for Bloody Marys, this recipe is a delightful way to enhance your pantry with bold flavors. Whether you’re a seasoned pickler or a beginner in the art of preserving, this recipe is straightforward, easy, and utterly satisfying.
Detailed Ingredients with Measures
A Flavorful Combination for Perfect Pickled Okra
To create a jar of yummy spicy pickled okra, you’ll need the following ingredients measured to precise quantities:
1 pound of fresh okra pods
2 cups of vinegar (white or apple cider vinegar are both excellent options)
2 cups of water
1 tablespoon of salt
1 tablespoon of sugar
4 garlic cloves
1 tablespoon of dill seeds or fresh dill sprigs
1 tablespoon of mustard seeds
1 or 2 red chili peppers for spice (adjust quantity based on your heat preference)
Black peppercorns as per taste
These simple, pantry-friendly ingredients are combined to produce the sharp brine and kick of heat that make this pickled okra recipe special.
Prep Time
Simple Steps for Great Results
Preparing spicy pickled okra doesn’t have to be complicated. This recipe’s prep time is approximately 20 minutes. In this time, you will rinse the okra pods, sterilize the jars, and assemble all the ingredients for brining. Careful attention during prep ensures a delicious and well-balanced jar of pickled veggies.
Cook Time, Total Time, Yield
Brine Perfection in Minimal Time
The cook time for this recipe is about 10 minutes—just enough to boil the brine ingredients together. Combine this with the prep time, and the total time totals approximately 30 minutes. The recipe typically yields around 3-4 pint-sized jars of spicy pickled okra, depending on the size and length of your okra pods.
Why You’ll Love This Recipe
This spicy pickled okra recipe is a treat for anyone who loves a good tangy snack with a bit of heat. The ease of recipe preparation, along with the versatility of the finished okra as a side or additive, makes it a winner in any kitchen. From its minimal prep time to its incredible transforming of simple ingredients into bold flavors, you’ll likely find yourself making it over and over again.
Enjoy your spicy pickled okra—it’s sure to become a staple in your jarred goods collection!
“`html
Detailed Directions and Instructions
Step 1: Prepare the Jars
– Thoroughly wash and sterilize jars and lids by boiling them in water for 10 minutes.
– Set the jars aside to dry on a clean towel until ready to use.
Step 2: Wash and Trim the Okra
– Rinse the fresh okra with cold water to remove any dirt or debris.
– Use a knife to trim the stem caps, being careful not to cut too deeply into the pod.
Step 3: Pack the Jars
– Tightly pack the jars with fresh okra, standing the pods upright.
– Add garlic cloves, dill sprigs, and optional hot peppers around the okra to flavor the pickles.
Step 4: Prepare the Brine
– In a large saucepan, combine water, white vinegar, kosher salt, and sugar.
– Bring the mixture to a boil over medium-high heat, stirring to ensure the salt and sugar have dissolved.
Step 5: Add Spices to the Jars
– Divide mustard seeds, dill seeds, and any additional seasonings evenly between the jars.
Step 6: Pour the Brine
– Carefully pour the hot brine over the okra in each jar, ensuring the okra is fully submerged.
– Leave about 1/2 inch of headspace at the top of the jar.
Step 7: Seal the Jars
– Wipe the rims of the jars with a clean damp cloth to remove any residue.
– Place the lids on the jars and screw on the bands until fingertip tight.
Step 8: Process the Jars
– Place the jars in a water bath canner with boiling water. Ensure the water covers the jars by at least 1 inch.
– Process the jars for 10 minutes, adjusting for altitude if necessary.
Step 9: Cool and Store
– Remove the jars from the boiling water using jar tongs and place them on a clean towel to cool. Avoid touching or disturbing them during this step.
– Once cooled, check the seals to ensure the lids are properly vacuum-sealed. Store jars in a cool, dark place. Allow at least 1-2 weeks for the flavors to fully develop before consuming.
Notes
Note 1: Selecting Fresh Okra
– Choose young, tender okra pods for the best results. Overripe or woody pods won’t pickle well.
Note 2: Adjust Heat Level
– Add more or fewer hot peppers depending on your spice preference. Jalapeños, habaneros, or crushed red pepper flakes can all be used.
Note 3: Sterilizing Jars
– Proper sterilization is crucial to ensure your pickles are safe to eat and preserve well.
Note 4: Shelf Life
– Pickled okra can last up to one year if stored in a cool, dry place. Once opened, store in the refrigerator and consume within a month.
Note 5: Alternative Spices
– Feel free to experiment with additional spices like celery seed, coriander, or cumin for unique flavor variations.
Note 6: High-Altitude Adjustments
– If you live at a high altitude, increase processing time by 1 minute for every additional 1,000 feet above sea level.
“`
Cook Techniques
Trim the Okra
To prepare for pickling, trim the okra by cutting off the stem end without slicing into the pod. This helps maintain the pod’s integrity when pickled.
Prepare the Brine
A good pickling solution (brine) is key. Combine water, vinegar, and seasonings, then heat the mixture until it just begins to simmer. Ensure the salt is dissolved completely for optimal flavor infusion.
Packing Jars
Sterilize jars and pack them tightly with okra pods, ensuring the pods are arranged upright if possible. Leave adequate headspace at the top of the jar for proper sealing.
Adding Spices and Flavorings
Layer spices such as garlic or red pepper flakes in with the okra pods. The spices will infuse into the okra for added flavor during the pickling process.
Adding Brine to Jars
Pour the hot brine over the okra pods in the jars. Make sure the pods are fully submerged, and use a non-metallic utensil to eliminate any air bubbles.
Seal and Process the Jars
Wipe the rim of the jars clean before placing the lids and rings on top. Use a water bath canner to process the jars, ensuring they are submerged in boiling water for the correct amount of time to ensure proper preservation.
Cooling and Checking Seals
After processing, allow the jars to cool undisturbed. Check to ensure a proper seal has formed by pressing on the center of each lid; it should not flex or pop.
Storage
Store the jars in a cool, dark place to allow the flavors to meld over time. This helps improve the overall flavor of the pickled okra.
FAQ
Can I use frozen okra for pickling?
Fresh okra is recommended for pickling, as frozen okra may become too soft during the process.
How long should I wait before eating pickled okra?
For the best flavor, allow the pickled okra to sit for at least two weeks before consuming.
Why do I need to sterilize jars before canning?
Sterilizing jars ensures the removal of harmful bacteria and prevents spoilage during long-term storage.
Can I reuse canning lids?
It’s not recommended to reuse canning lids, as they might not seal properly during the second use.
How long does pickled okra last?
Properly sealed and stored jars can last up to one year in a cool, dark place.
My jars didn’t seal correctly. What should I do?
If jars fail to seal, refrigerate them and consume the pickled okra within a few weeks instead of storing them long-term.
Can I adjust the spices to my taste?
Yes, the spices can be customized to suit your preferences. Adjust garlic, red pepper flakes, or other spices as you’d like.
Why is headspace important in canning?
Leaving the correct amount of headspace ensures a good vacuum seal and prevents the contents from overflowing during processing.
Is a water bath canner necessary?
Yes, a water bath canner is essential for safe canning of pickled foods with high acidity to kill potential bacteria and ensure proper preservation.
Conclusion
Pickled okra is a delightful way to preserve summer produce, providing a savory and tangy snack or side that complements meals beautifully. Its spicy twist elevates the flavors, making it a favorite for those who enjoy a bit of heat. Whether as a topping, a garnish, or a snack, it’s a versatile addition to your kitchen repertoire and a great way to introduce unique flavors to your dishes.
More recipes suggestions and combination
Spicy Pickled Green Beans
Try spicy pickled green beans as a crunchy accompaniment to sandwiches, salads, or charcuterie boards.
Dill Pickled Vegetables
Create a mix of your favorite vegetables like carrots, cauliflower, and bell peppers for a tangy snack or side.
Sweet and Spicy Pickled Jalapeños
Add a hint of sweetness to spicy jalapeños, perfect for tacos, nachos, or sandwiches.
Quick Refrigerator Pickles
Make easy and fresh pickled cucumbers in no time, great for garnishing burgers or as a snack.
Pickled Red Onions
Use pickled red onions to add a burst of tangy flavor to tacos, salads, or avocado toast.
Pickled Banana Peppers
Spicy and tangy banana peppers are a great topping for pizzas, subs, or salads.
Spicy Sauerkraut
Take traditional sauerkraut up a notch with a bit of heat, ideal for hot dogs or bratwursts.
Pickled Carrots and Ginger
Combine pickled carrots with ginger for a refreshing and flavorful snack or sushi side.
Spicy Pickled Asparagus
Pickled asparagus adds crunch and bold flavors to cocktails or charcuterie boards.
Crispy Kimchi
Try homemade spicy kimchi as a vibrant and tangy addition to rice dishes or grilled meats.

