Easy Skillet Cherry Crisp
Introduction
Looking for a delightful and easy dessert to whip up? This skillet cherry crisp is a winning recipe that combines a juicy cherry base topped with an irresistibly crumbly and buttery topping. Whether you’re entertaining guests or craving something sweet for a cozy night in, this recipe delivers a comforting dessert in no time!
Detailed Ingredients with measures
Cherry Filling
Cherries – Fresh or frozen, pitted
Granulated sugar – For sweetness
Cornstarch – To thicken the filling
Lemon juice – Adds a fresh and tangy balance
Pure almond extract – Enhances the flavor of the cherries
Crisp Topping
Rolled oats – For a chewy texture
All-purpose flour – Provides structure
Light brown sugar – Adds sweetness and depth
Ground cinnamon – For warmth and spice
Salt – Heightens the flavors
Unsalted butter – Cold and cubed, for a flaky crisp topping
Prep Time
This recipe has a quick prep time, so it’s perfect for those moments you need a dessert without too much hassle. After preparing the cherry filling and mixing the topping, the hardest part is waiting for it to bake!
Cook Time, Total Time, Yield
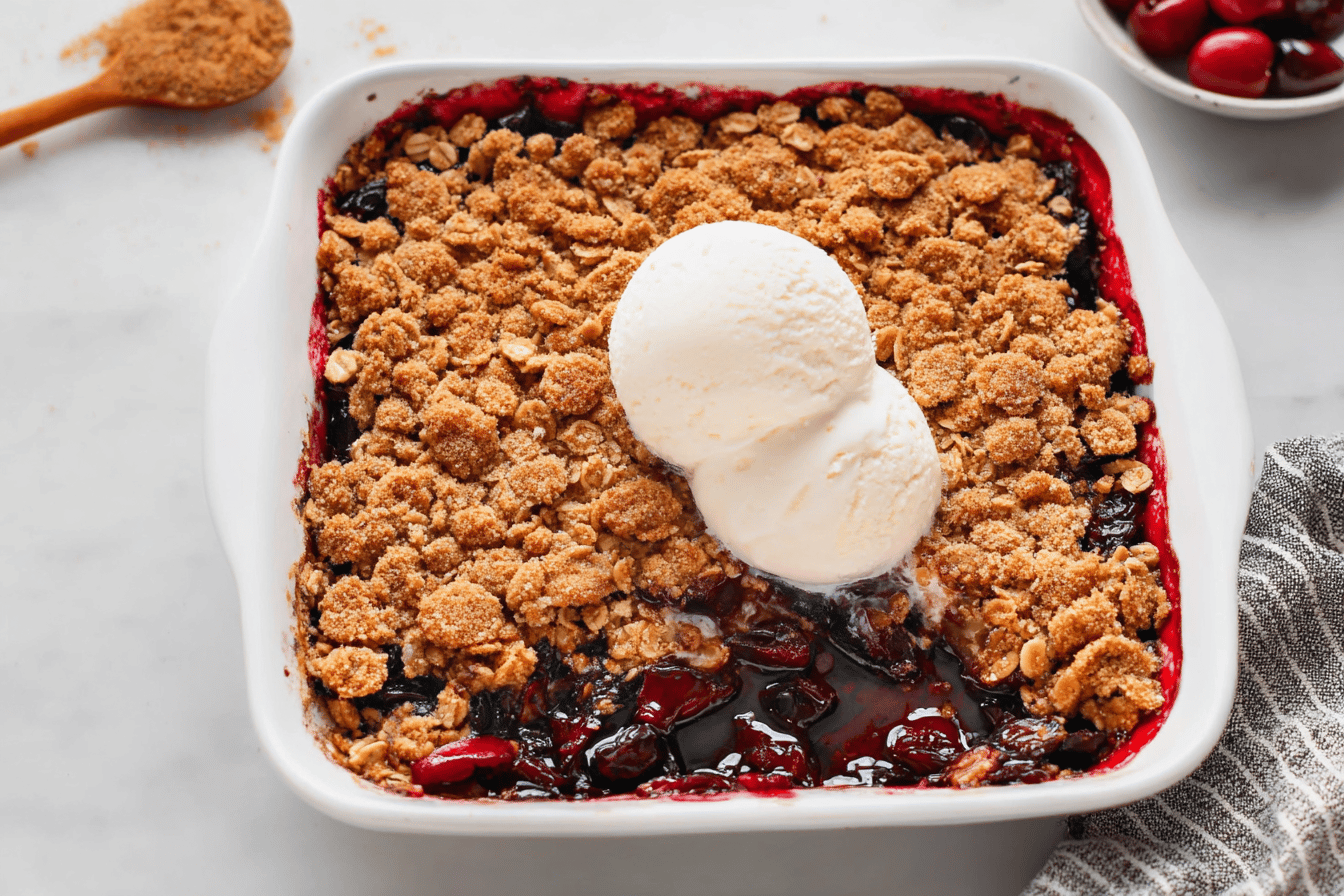
The cook time ensures the cherries become bubbly and tender while the topping crisps to a golden perfection. From start to finish, this recipe comes together effortlessly, and the yield provides enough to share or keep all to yourself. Enjoy this warm and delicious dessert with a scoop of vanilla ice cream, and it might just become your new favorite go-to treat!
“`html
Detailed Directions and Instructions
Step 1: Preheat the oven
Preheat your oven to 350 degrees F to ensure it is hot and ready when you need it.
Step 2: Prepare the cherry filling
In a large bowl, combine canned cherry pie filling and liquid from a lemon (about 1 tablespoon of fresh lemon juice). Mix until the filling is smooth and the lemon juice is evenly distributed. Transfer the filling into a greased, oven-safe 10-inch skillet or similarly sized baking dish, spreading it out evenly.
Step 3: Prepare the topping
In a medium-sized bowl, combine old-fashioned rolled oats, all-purpose flour, light brown sugar, ground cinnamon, and a pinch of salt. Stir gently until the dry ingredients are well mixed.
Cut cold, unsalted butter into small cubes, and using your fingers or a pastry cutter, mix the butter into the dry ingredients. Work quickly until the butter is well incorporated and the mixture is crumbly and forms small clumps.
Step 4: Assemble the crisp
Evenly sprinkle the prepared topping mixture over the cherry filling in the skillet. Be sure to cover the entire surface.
Step 5: Bake
Place the skillet in the preheated oven and bake for about 28-32 minutes, or until the topping is golden brown and the cherry filling is bubbling around the edges.
Step 6: Cool before serving
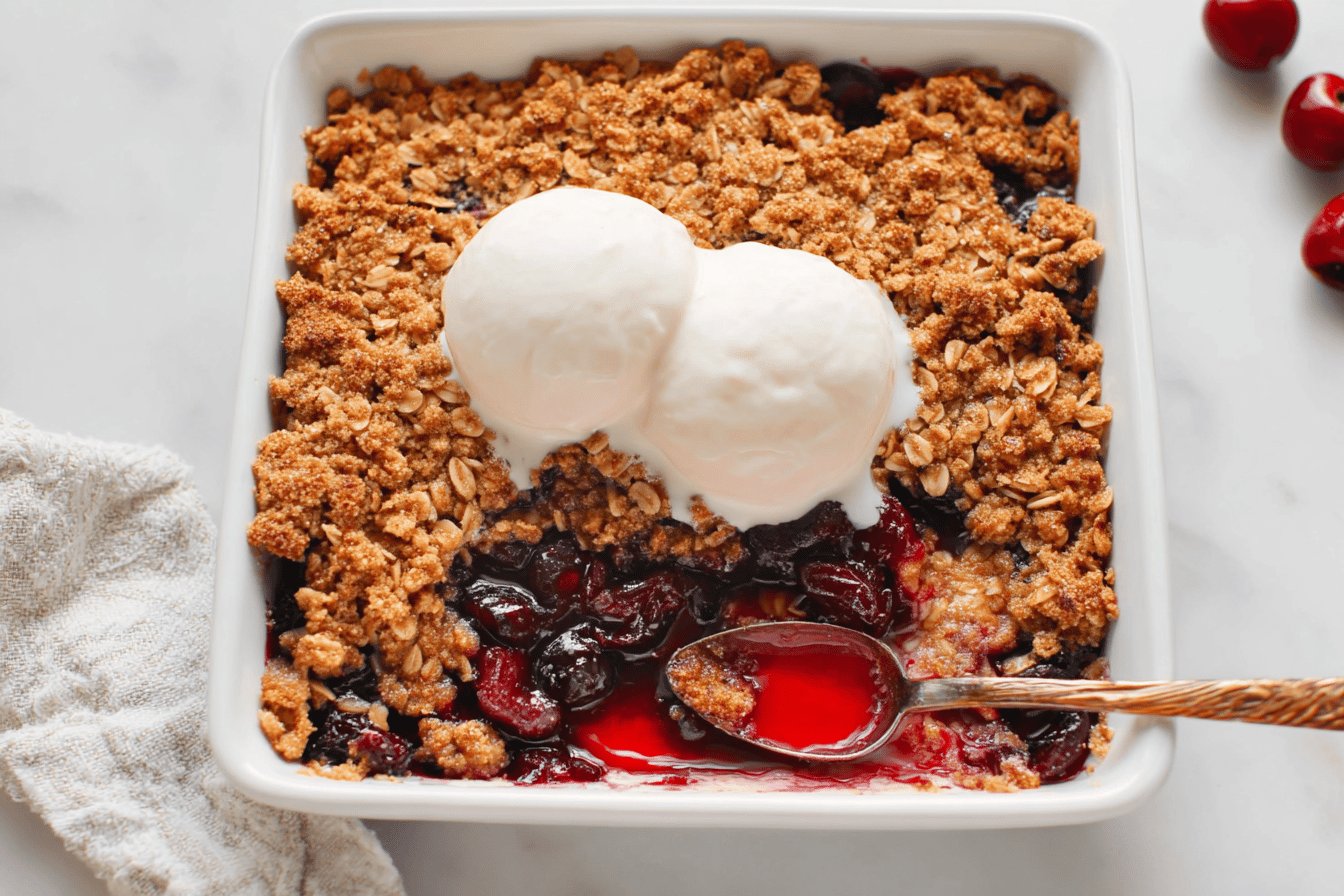
Allow the cherry crisp to cool for about 10-15 minutes at room temperature before serving. This allows the filling to set slightly and makes for easier serving.
Step 7: Serve
Serve the cherry crisp warm with a scoop of vanilla ice cream or a dollop of whipped cream, if desired.
Notes
Note 1: Skillet size
A 10-inch cast-iron skillet is ideal for this recipe, but if you don’t have one, any similar-sized oven-safe baking dish will work. Adjust cooking time slightly based on the dish you use.
Note 2: Cherry filling
This recipe uses canned cherry pie filling for convenience, but fresh cherry filling can be prepared if you prefer. Ensure the filling is sweetened accordingly.
Note 3: Butter
Keep the butter cold to create a crumbly topping. Warm or melted butter won’t produce the right texture.
Note 4: Storage
Store leftovers in an airtight container in the refrigerator for up to 3 days. Reheat individual servings in the microwave or use the oven for a larger portion.
Note 5: Optional additions
Consider adding chopped nuts, such as pecans or walnuts, to the topping mixture for added crunch and flavor.
Note 6: Gluten-free option
Substitute all-purpose flour with a gluten-free flour blend to make this dessert gluten-free. Ensure the oats you use are certified gluten-free.
“`
Cook Techniques
How to Toast Oats
To toast oats, spread them out evenly on a dry skillet and cook over medium heat, stirring frequently until golden and fragrant—this usually takes just a few minutes. Pay close attention, as oats can burn quickly if left unattended.
Preparing the Skillet
Use an oven-safe skillet for this recipe to ensure an easy transition from stove to oven. Lightly grease or butter the skillet to prevent sticking and make cleanup easier.
Layering the Crisp
Start by spreading cherries as an even base layer in the skillet. Then, sprinkle the topping evenly over the fruit. Avoid compacting the topping as it may reduce crispness.
Baking for the Perfect Crisp
Ensure the oven is preheated to achieve an even bake. Bake the crisp until the topping is golden brown and the cherries are bubbling around the edges. Start timing based on the recipe instructions, but also rely on visual cues for doneness.
Resting the Baked Crisp
Let the cherry crisp cool slightly before serving. Resting allows the juices to thicken and the flavors to meld beautifully, resulting in a more enjoyable texture and taste.
FAQ
Can I use frozen cherries instead of fresh?
Yes, frozen cherries can be used in place of fresh. Ensure they are thawed and drained before adding them to the skillet to prevent excess moisture.
What type of oats should I use?
For this recipe, use old-fashioned or rolled oats. Quick oats are not recommended as they can become too soft and lose their texture during baking.
Can I make this recipe ahead of time?
While the crisp is best served fresh, it can be made ahead and stored. Once cooled, cover and refrigerate. Reheat gently in the oven or microwave for best results.
Can I substitute the cherries with other fruits?
Yes, while cherries are the main feature, other fruits such as peaches, apples, or berries can be substituted or combined for a unique flavor.
Do I need to peel the cherries?
No, there’s no need to peel cherries. Their skins soften beautifully during baking, adding to the dish’s flavor and texture.
How do I store leftovers?
Leftover cherry crisp should be covered tightly and stored in the refrigerator. It’s best enjoyed within a few days for optimal freshness and flavor.
Conclusion
This Easy Skillet Cherry Crisp is a delightful dessert that balances the sweetness of juicy cherries with a crunchy, buttery oat topping. It’s an ideal dessert option for any season, and the skillet preparation gives it a rustic, homey feel that will impress anyone. Simple yet bursting with flavor, this recipe is sure to become a new favorite in your dessert repertoire.
More recipes suggestions and combination
Peach and Blueberry Crisp
Combine sweet peaches and tangy blueberries for a colorful and flavorful crisp.
Apple Crisp with Caramel Drizzle
Upgrade the traditional apple crisp by adding a rich caramel drizzle on top before serving.
Mixed Berry Skillet Crisp
Use strawberries, raspberries, and blackberries for a mixed-berry twist.
Plum and Almond Crisp
Try juicy plums and top with sliced almonds for added crunch and flavor.
Tropical Mango Pineapple Crisp
Create a tropical version by combining mangoes and pineapples with a coconut topping.
Chocolate and Cherry Dessert Combo
Pair this cherry crisp with a scoop of chocolate ice cream or drizzle melted chocolate for an indulgent treat.