Classic Homemade Chili Recipe
Introduction
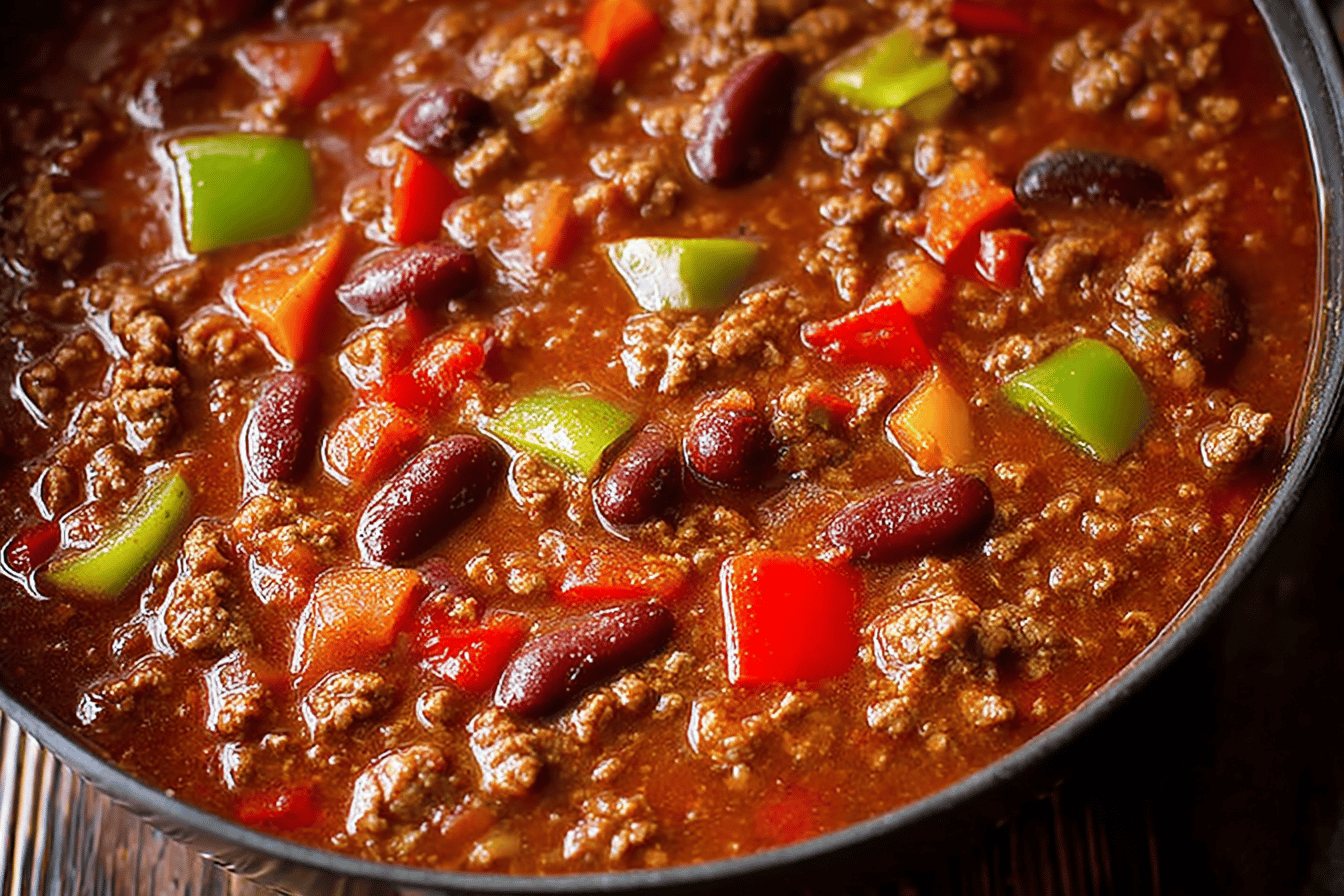
If you’re in search of a hearty and flavorful dish to satisfy your cravings, a classic chili recipe is the perfect choice. It’s a comforting meal that is packed with robust flavors, offering a rich combination of ground meat, tomatoes, beans, and carefully curated spices. This recipe is simple to follow and yields a deliciously satisfying result you can enjoy with friends and family. Whether you’re making it for a busy weeknight dinner or a weekend gathering, this chili recipe is sure to be a hit!
Detailed Ingredients with Measures
Ground beef – 2 pounds
Onion, chopped – 1 medium
Bell pepper, chopped – 1 medium
Garlic cloves, minced – 2
Tomato paste – 2 tablespoons
Diced tomatoes (canned) – 28 ounces
Kidney beans, drained – 16 ounces
Chili powder – 2 tablespoons
Ground cumin – 1 teaspoon
Smoked paprika – 1 teaspoon
Salt and pepper to taste
Water or broth – 1 cup
Optional toppings: shredded cheese, chopped cilantro, sour cream
Prep Time
The preparation process for this chili recipe is straightforward and involves minimal effort. Begin by chopping all your vegetables and preparing your spices beforehand. This ensures a seamless cooking experience without delays.
Cook Time, Total Time, Yield
Cooking this chili generally takes around 30 minutes, depending on your stovetop heat and equipment. When combined with a prep time of about 10 minutes, the total time for this dish caps at 40 minutes. The recipe yields approximately 6 to 8 servings, making it ideal for a family meal or leftovers for the week.
Detailed Directions and Instructions
Step 1: Sauté the Vegetables
1. Preheat a medium-sized pot or Dutch oven over medium heat.
2. Add a drizzle of oil to the pot.
3. When the oil is warm, add the chopped onions, bell peppers, and garlic.
4. Sauté for 4 to 5 minutes until the vegetables soften and the onions become translucent.
Step 2: Brown the Ground Beef
1. Add the ground beef to the pot with the sautéed veggies.
2. Use a wooden spoon or spatula to break up the meat into small chunks.
3. Cook for 6 to 8 minutes, stirring occasionally, until the beef is browned and cooked through.
4. If excessive grease accumulates while cooking, drain the extra grease but leave a small amount for flavor.
Step 3: Add the Spices and Tomato Paste
1. Reduce the heat to medium-low.
2. Stir in the chili powder, cumin, smoked paprika, oregano, and a pinch of salt and pepper.
3. Add the tomato paste and mix thoroughly with the beef and vegetables until everything is evenly coated. This will enhance the flavor of the spices.
Step 4: Add the Tomatoes and Liquids
1. Stir in the canned diced tomatoes and tomato sauce.
2. Add the beef broth to the pot to thin out the chili base.
3. Bring the mixture to a gentle boil over medium heat.
Step 5: Simmer the Chili
1. Once boiling, reduce the heat to low and cover the pot with a lid.
2. Let the chili simmer gently for 20 to 25 minutes to allow the flavors to fully develop.
3. Stir occasionally to prevent sticking and burning.
Step 6: Add the Beans
1. Rinse and drain the canned beans.
2. Add them to the pot and mix well with the chili.
3. Simmer for another 10 minutes until everything is heated through and beans are tender.
Step 7: Taste and Adjust Seasonings
1. Taste the chili and adjust the seasoning, adding more salt, pepper, or spices if needed.
2. Stir well and ensure everything is blended.
Step 8: Serve
1. Ladle the hot chili into bowls.
2. Top with desired garnishes like shredded cheese, sour cream, chopped green onions, or fresh cilantro.
3. Serve and enjoy.
Notes
Note 1: Choosing the Right Beans
You can use kidney beans, black beans, or pinto beans based on your preference. Combining different types of beans is also an option for added texture and flavor.
Note 2: Ground Beef Substitution
For a leaner option, you can use ground turkey or chicken instead of ground beef. Adjust the cooking time as needed to ensure the meat is properly cooked.
Note 3: Adjusting Spice Levels
For a spicier chili, add cayenne pepper or diced fresh chili peppers to the mix. For a milder version, reduce the amount of chili powder and enhance other seasonings like cumin or oregano.
Note 4: Thickness of Chili
If the chili is too thick, add extra beef broth or water to thin it out to your preferred consistency.
Note 5: Storage and Freezing
Leftover chili can be stored in an airtight container in the refrigerator for up to 4 days. It also freezes well; store it in a freezer-safe container for up to 3 months. Reheat on the stove or in the microwave before serving.
Cook Techniques
Sauté the Aromatics
Start by sautéing the onions, garlic, and other aromatics in a bit of oil to enhance their flavors. This step adds depth to the chili.
Brown the Meat
When cooking with ground beef or other meats, browning it over medium-high heat gives the chili a savory foundation.
Simmer for Maximum Flavor
Allowing the chili to simmer for at least 30 minutes helps meld the ingredients, intensifying the flavors and enriching the dish.
Use Proper Seasoning
Add spices like chili powder, cumin, paprika, and salt strategically throughout cooking to build a well-balanced taste.
Add Liquid Gradually
When incorporating liquids like broth or crushed tomatoes, do so gradually, adjusting consistency as needed to avoid a watery chili.
Customize Toppings
Garnish with cheese, sour cream, or fresh cilantro for added texture and flavor, allowing personalization based on preferences.
FAQ
Can I make this recipe spicier?
Yes, you can adjust the spice level by adding more chili powder or incorporating diced jalapeño or red pepper flakes.
Can I use a different type of meat?
Yes, you can substitute ground beef with turkey, chicken, or a plant-based alternative.
How can I make this chili vegetarian?
Leave out the meat and add more beans or use plant-based protein options.
Can I freeze leftover chili?
Yes, this chili freezes well. Store it in an airtight container and freeze for up to three months.
What are the best beans for chili?
Kidney beans, black beans, and pinto beans are ideal choices, but you can use your preferred variety.
How long should I simmer chili?
Simmer for at least 30 minutes, but for deeper flavors, cook for up to an hour or more.
Can I make chili in advance?
Yes, chili tastes even better the next day as the flavors continue to develop.
What can I serve with chili?
Pair chili with cornbread, rice, baked potatoes, or tortilla chips for a complete meal.
Why does chili taste better the next day?
Resting the chili overnight allows the flavors to meld and intensify.
Conclusion
The classic chili recipe is a hearty, satisfying option for anyone seeking a comforting meal. Its balance of flavors and simplicity make it a delightful dish to prepare and enjoy. With its versatility, you can easily customize it according to your taste or dietary preferences. Whether served on its own, as a topping, or with a side, this chili recipe is sure to become a staple in your culinary repertoire.
More Recipes Suggestions and Combination
Stuffed Bell Peppers
Use the chili as a filling for bell peppers, top with cheese, and bake until tender.
Chili Cheese Fries
Top a batch of crispy fries with chili and a generous layer of melted cheese for a fun, indulgent snack.
Loaded Chili Baked Potatoes
Serve the chili over baked potatoes with sour cream, shredded cheese, and green onions for a hearty meal.
Chili Mac
Combine the chili with cooked macaroni, sprinkle with cheese, and bake for a comforting casserole-style dish.
Chili Tacos
Transform the chili into a quick taco filling, adding crunchy taco shells, lettuce, and diced tomatoes.
Chili Dip
Layer the chili with cream cheese and shredded cheese in a baking dish to create a warm, savory dip perfect for chips and gatherings.
Chili Nachos
Top tortilla chips with chili, melted cheese, jalapeños, and other favorite toppings for a quick and flavorful snack or appetizer.
Chili-Stuffed Skillet Cornbread
Bake a skillet cornbread with a layer of chili in the center for a fun twist on combining bread and stew.