Classic Chili Con Carne Recipe
Introduction
If you’re in search of a warm, hearty dish that’s brimming with flavor, the classic chili con carne recipe from Her Kitchen Stories is a culinary masterpiece worth exploring. This delightful dish is perfect for bringing friends and family together over its rich and comforting flavors. Whether you’re preparing it for a cozy dinner or a special gathering, chili con carne is a timeless recipe that never goes out of style.
Detailed Ingredients with measures
Ground beef
For the base of this mouthwatering chili, ground beef is essential for its rich and meaty flavor.
Onion
Chopped onion adds aromatic depth and brings balance to the dish.
Garlic cloves
Minced garlic introduces a burst of pungent flavor that elevates the overall taste.
Red bell pepper
A chopped red bell pepper delivers a subtle sweetness and vibrant texture.
Tomato paste
This ingredient creates the base of the sauce, contributing a concentrated tomato essence.
Canned diced tomatoes
Bursting with flavor, diced tomatoes build the body of the chili with a fresh, tangy profile.
Kidney beans
Kidney beans add texture and elevate the protein content while providing a classic chili character.
Beef stock
A hearty beef stock deepens the flavor and enhances the richness of the chili.
Spices
A thoughtfully curated mix of chili powder, cumin, paprika, and cayenne contributes layers of robust seasoning.
Prep Time
Chili con carne requires attention to detail during the preparation process to ensure that all of the ingredients work harmoniously together. Dedicate about 15 to 20 minutes to prepping the components, including chopping the vegetables, measuring the spices, and preparing the ground beef.
Cook Time, Total Time, Yield
Prepare yourself for a fragrant kitchen as the chili simmers to perfection. The cook time generally takes approximately 50 minutes, during which the flavors will marry beautifully. This brings the total time to about 1 hour and 10 minutes, accounting for prep and cooking. As for servings, this recipe yields enough to comfortably feed around 4 to 6 people, making it an excellent crowd-pleasing choice.
Prepare your ingredients, settle in for some cozy cooking, and enjoy the delicious journey of crafting a classic chili con carne. It’s a recipe that will warm hearts and bring smiles to the table every time!
Detailed Directions and Instructions
Step 1: Prepare Your Ingredients
Chop onions, garlic, and other vegetables such as bell peppers if included. Rinse your beans if they are canned to remove excess sodium.
Step 2: Heat the Oil
In a large pot or Dutch oven, heat a tablespoon of oil over medium heat until it shimmers.
Step 3: Cook the Onions and Garlic
Add the chopped onions to the heated oil and sauté until soft and translucent. Add the minced garlic and cook for another minute, making sure it doesn’t burn.
Step 4: Brown the Ground Meat
Add the ground beef (or your preferred ground meat) to the pot. Break the meat apart with a wooden spoon or spatula, stirring occasionally, until it is browned and no longer pink.
Step 5: Add Spices
Sprinkle paprika, cumin, chili powder, and any other spices you prefer directly onto the meat mixture. Stir well to combine, ensuring the meat is evenly coated with the seasoning.
Step 6: Add Tomato Paste
Mix in tomato paste to deepen the flavor. Let it cook with the mixture for about 2 minutes.
Step 7: Add Liquids
Pour in canned diced tomatoes, beef stock, or water as required. Stir everything together, ensuring the liquid is distributed evenly.
Step 8: Add Beans and Vegetables
Add the rinsed beans and any prepared vegetables, such as diced bell peppers or carrots, into the pot. Stir well to combine.
Step 9: Simmer the Chili
Lower the heat to a gentle simmer. Cover the pot and let the chili cook for 20-30 minutes, stirring occasionally to prevent sticking and ensure even cooking.
Step 10: Adjust Seasoning
Taste the chili and adjust the seasoning if necessary, adding salt, pepper, or more spices to your preference.
Step 11: Finish and Serve
Once the chili has thickened and all the flavors have melded together, remove the pot from the heat. Serve hot with your choice of toppings like shredded cheese, sour cream, or chopped cilantro.
Notes
Note 1: Choosing Your Meat
For a healthier option, use lean ground beef, ground turkey, or ground chicken. Each will bring a slightly different flavor to the dish.
Note 2: Adjusting Spice Levels
If you prefer a milder chili, reduce the amount of chili powder and paprika. Alternatively, for a spicier kick, add a pinch of cayenne pepper or fresh chili.
Note 3: Adding Sweetness
A small amount of sugar or a splash of honey can balance out the acidity from the tomatoes if needed.
Note 4: Thickening the Chili
If the chili is too liquid, let it simmer uncovered to reduce the liquid and thicken the sauce.
Note 5: Storage and Reheating
Leftover chili can be stored in an airtight container in the refrigerator for up to 3 days or frozen for up to 3 months. Reheat over low heat on the stovetop for best results.
Note 6: Vegetarian Option
To make this recipe vegetarian, use a plant-based ground meat substitute or simply increase the beans and vegetables.
Note 7: Optional Toppings
Popular toppings include shredded cheese, sour cream, diced onions, jalapeños, cilantro, or crushed tortilla chips. Customize to your liking.
Cook Techniques
Sautéing the Vegetables
Sauté the onion and garlic in a pan with some cooking oil over medium heat until they become soft and aromatic. This step forms a flavorful base for your chili.
Browning the Meat
Add ground beef to the pan and cook it until browned. Break it up with a wooden spoon or spatula to ensure even cooking and avoid clumps.
Deglazing the Pan
Use a liquid like beef stock, water, or even canned tomatoes to deglaze the pan. This step helps incorporate the browned bits stuck at the bottom of the pan for added flavor.
Building Flavor with Spices
Add spices like cumin, paprika, and chili powder to the meat and vegetables. Cooking the spices for a short time releases their flavors and enhances the depth of the dish.
Simmering the Chili
After mixing the ingredients together, allow the chili to simmer on low heat. This helps meld the flavors together and thickens the chili.
Adjusting the Thickness
If the chili is too thick, add a little stock or water to reach your preferred consistency. If it’s too thin, allow it to simmer longer without a lid to reduce excess liquid.
Adding Beans at the Right Time
For the best texture, add canned beans (if using) closer to the end of cooking to prevent them from becoming too mushy.
Resting the Chili
After cooking, let the chili rest for a few minutes before serving. This allows the flavors to settle and makes the dish more cohesive.
FAQ
Can I use a different type of meat?
Yes, you can substitute ground beef with turkey, chicken, or even a plant-based meat alternative.
Is it okay to skip the beans?
Absolutely. Traditional chili recipes in some regions don’t include beans, so it’s perfectly fine to make it without them.
How do I make it less spicy?
Reduce the amount of chili powder and paprika. You can also add a little sugar or dairy, like sour cream, to balance the heat.
Can I prepare chili in advance?
Yes, chili often tastes better the next day as the flavors continue to develop. Store it in an airtight container in the refrigerator.
How do I store leftover chili?
Allow the chili to cool completely before transferring it to a sealed container. Store it in the refrigerator for up to 3-4 days or in the freezer for up to 3 months.
What toppings work well with chili?
Common toppings include shredded cheese, sour cream, diced onions, chopped cilantro, avocado slices, or crushed tortilla chips.
Can I make chili in a slow cooker?
Yes. After browning the meat and sautéing the vegetables, transfer everything to a slow cooker and cook on low for 6-8 hours or high for 3-4 hours.
What can I serve with chili?
Chili pairs well with cornbread, rice, baked potatoes, tortilla chips, or crusty bread.
“`html
Conclusion
This classic chili con carne recipe delivers a hearty and comforting dish packed with flavor and warmth. Its blend of spices, beans, and ground meat is ideal for a filling meal that satisfies every time. Enjoy it on its own or serve with creative sides to elevate your dining experience. The simplicity and richness of this dish make it a staple in many kitchens, and it’s perfect for various occasions, from casual weeknight dinners to gatherings with friends and family.
More recipes suggestions and combination
Classic cornbread pairing
Serve chili con carne with a slice of warm, buttery cornbread for the perfect Southern-inspired combination.
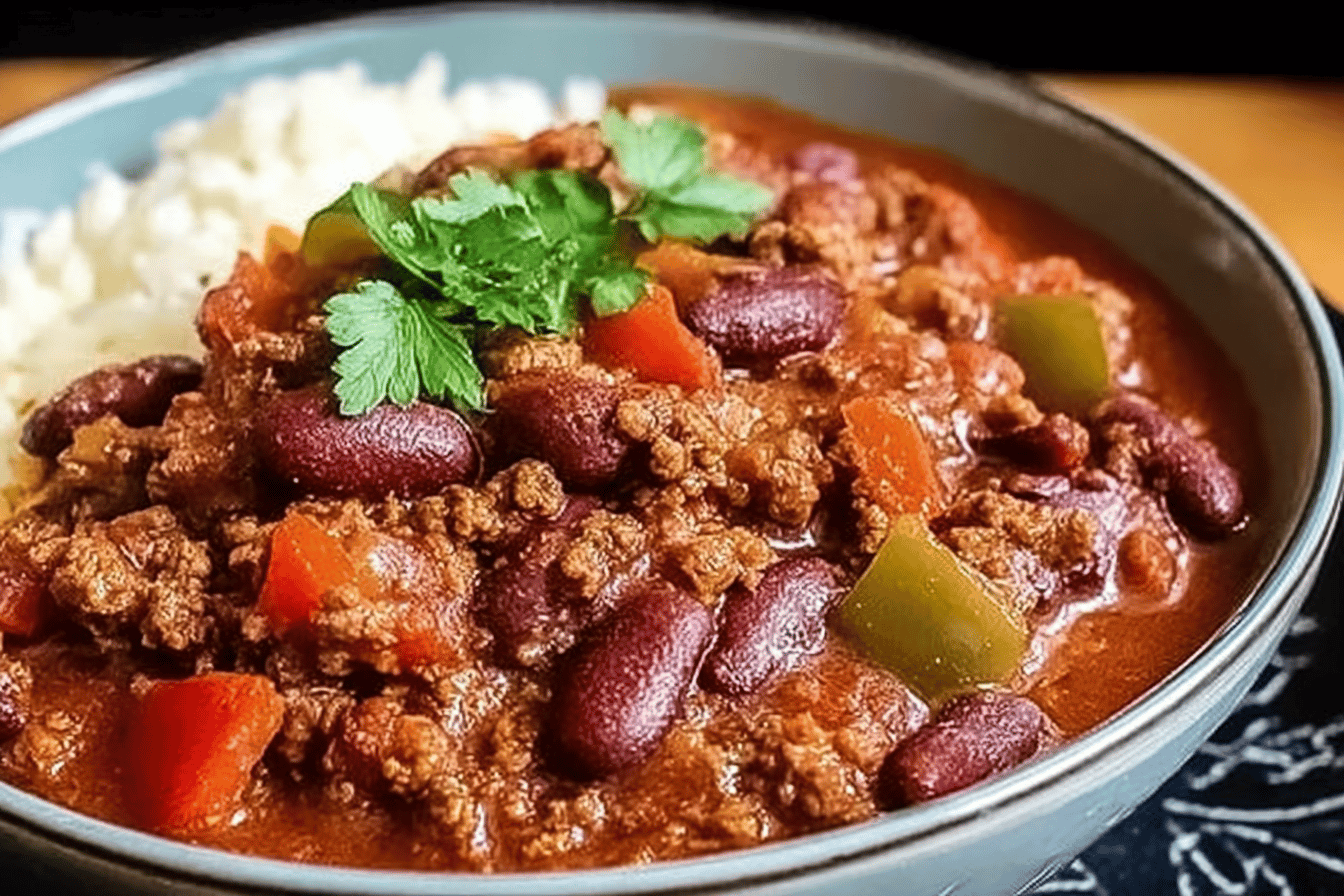
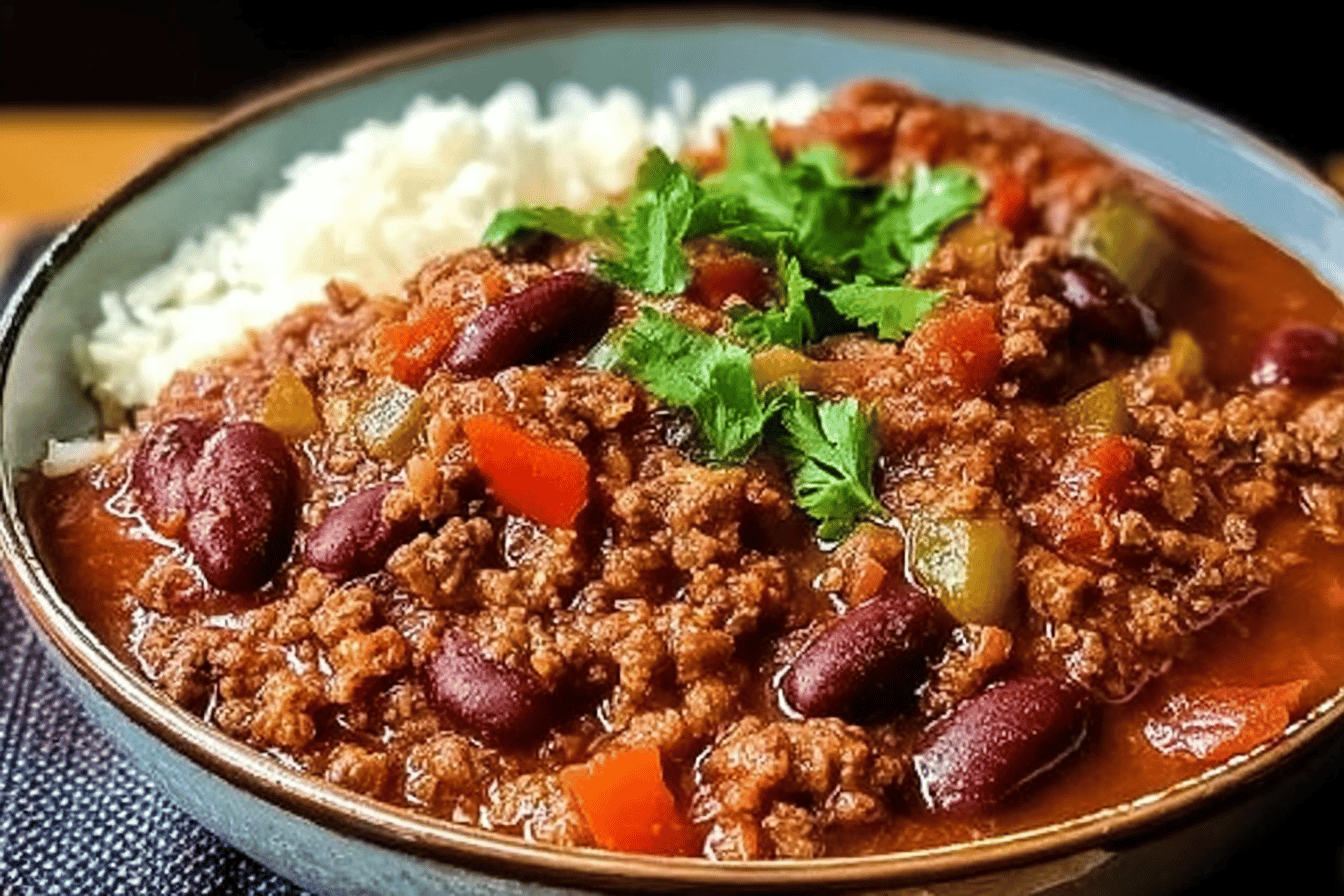
Rice and chili bowl
Create a full, balanced meal by pairing the chili with steamed rice, adding an extra layer of comfort to the dish.
Baked potato topping
Top a baked potato with a generous spoonful of chili, topped off with a sprinkle of shredded cheese and green onions.
Nachos with chili
Transform your chili into a delectable nacho topping by layering tortilla chips, chili, melted cheese, and jalapeño slices for a satisfying snack or meal.
Chili-stuffed bell peppers
Hollow out bell peppers and stuff them with chili con carne before baking them in the oven for a creative and flavorful meal.
Chili dog twist
Use the chili as a topping for hot dogs along with shredded cheese and diced onions for an indulgent treat.
“`