Easy Homemade Dill Pickle Relish
Introduction
If you’re on a mission to perfect your summer grilling or elevate your homemade recipes, adding a fantastic condiment to your repertoire can make all the difference. This easy homemade dill pickle relish is a flavorful addition that’s incredibly simple to make. Whether you’re using it to top a perfectly grilled hot dog or mixing it into your favorite potato salad, this relish is versatile and delightful.
Detailed Ingredients with Measures
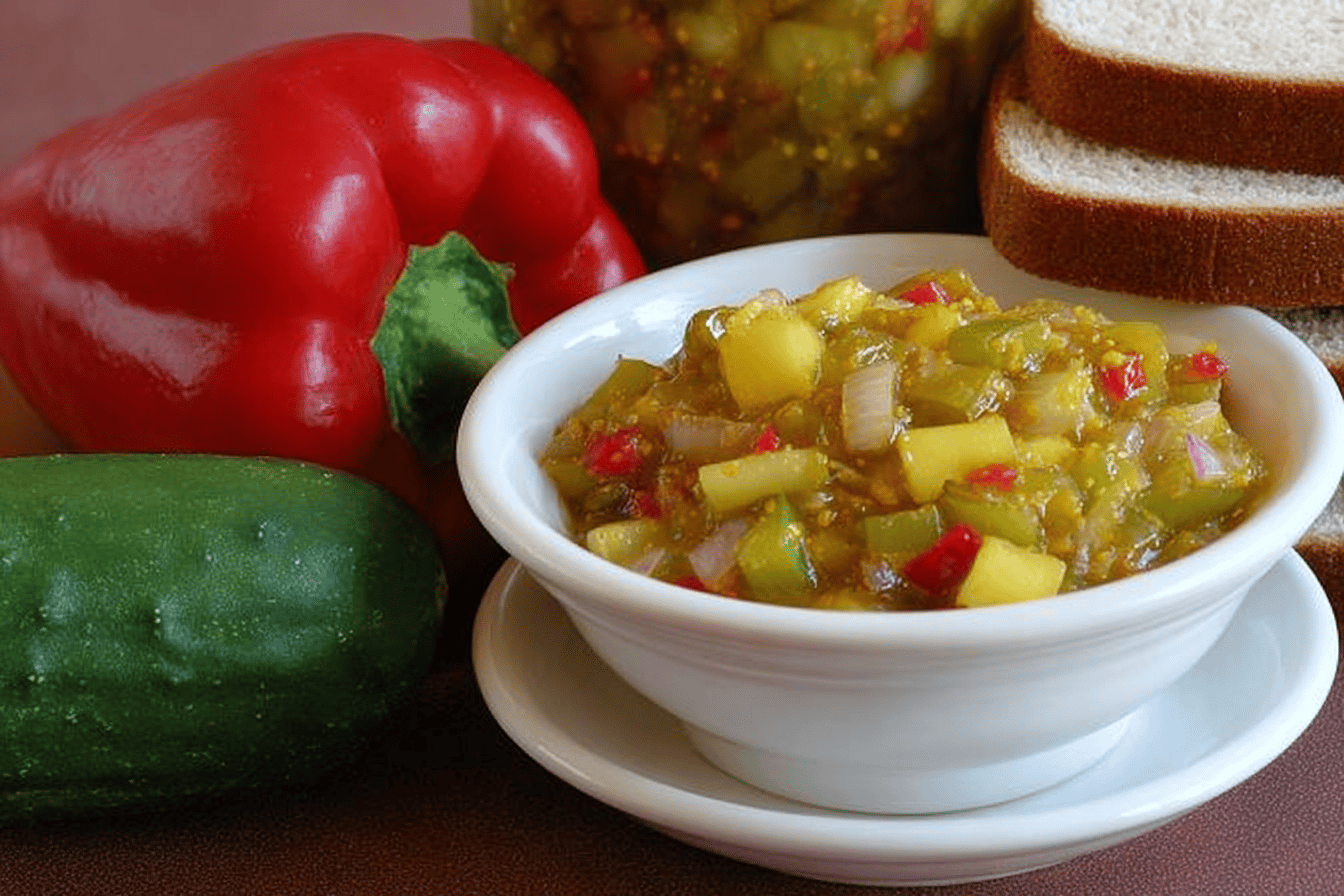
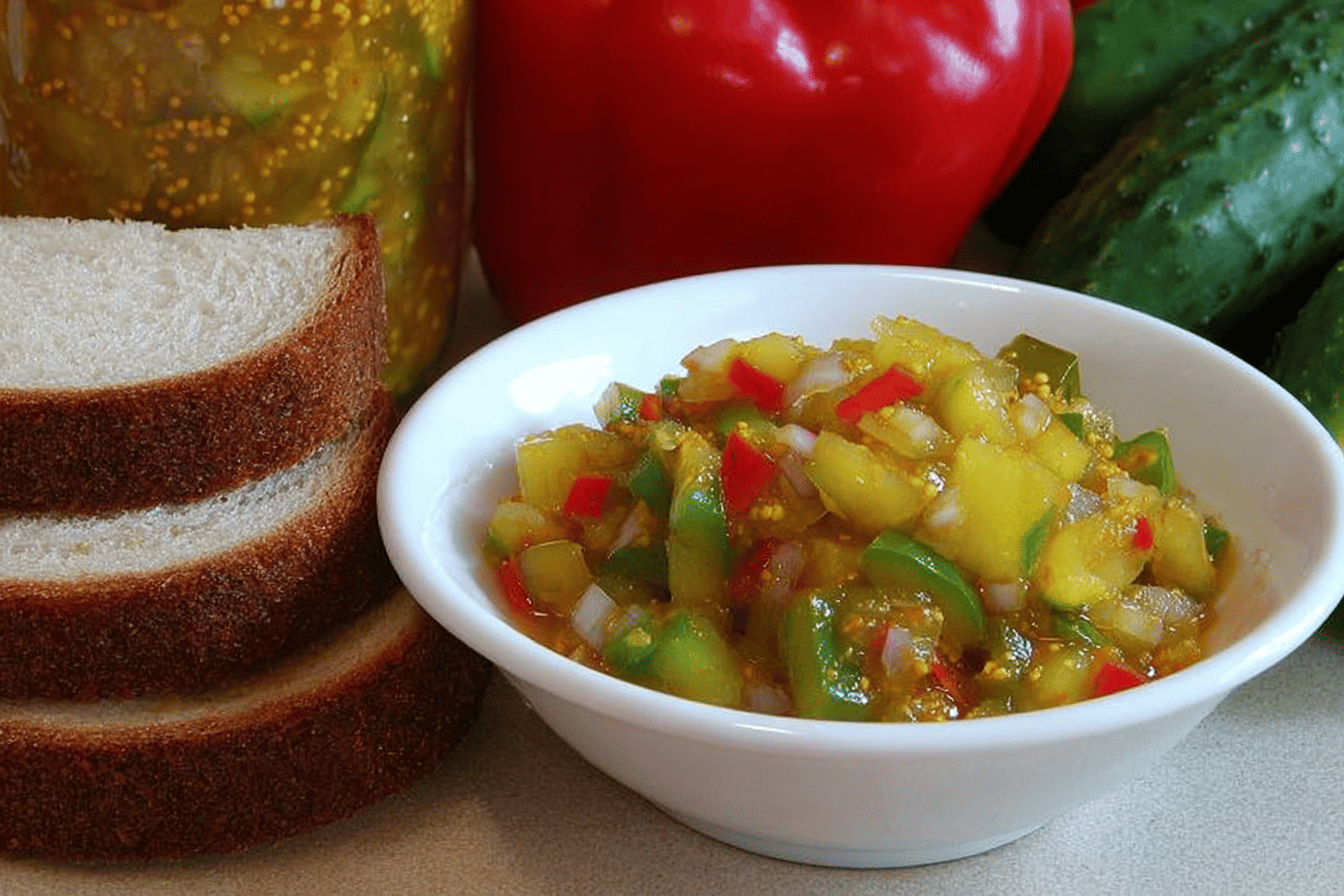
Cucumbers
Use fresh and crisp cucumbers for the base of your relish.
Onion
Chopped onion adds balance to the tanginess.
Salt
Essential for drawing out moisture and enhancing the flavor.
White vinegar
Provides the classic acidic tang for the relish.
Sugar
Balances the acidity with a touch of sweetness.
Fresh dill
Infuses the relish with that bold, signature dill flavor.
Celery seed
An optional ingredient that can boost the flavor profile if desired.
Prep Time
The preparation process will take only minutes of your time but is crucial for achieving the right consistency and flavor for the relish. Washing, chopping, and measuring the ingredients is straightforward, making this recipe beginner-friendly while yielding delicious results.
Cook Time, Total Time, Yield
The cook time for this relish is short, providing a relatively quick way to create a flavorful condiment. The total time includes preparation and cooking and results in a relish you can jar and store. Additionally, the recipe yields enough for several servings, allowing you to enjoy this vibrant condiment on multiple occasions.
By making your own dill pickle relish, you not only elevate your meals but also avoid unnecessary preservatives and achieve a fresh, homemade taste. With this simple guide, your relish will steal the show at any gathering!
“`html
Detailed Directions and Instructions
Step 1: Prep the Cucumbers
Wash the cucumbers thoroughly. Finely chop them into small, uniform pieces, or use a food processor to pulse them until finely chopped. Be careful not to over-process.
Step 2: Drain the Cucumbers
Place the chopped cucumbers into a colander and sprinkle them with salt. Let them sit for about an hour to draw out excess moisture. Afterward, use paper towels or a clean kitchen towel to press and squeeze out as much liquid as possible.
Step 3: Prepare the Remaining Ingredients
Finely chop the onion and bell pepper, or use the food processor to chop them into small pieces. Gather the vinegar, sugar, and pickling spices and set them aside.
Step 4: Cook the Relish
In a large pot over medium heat, combine the drained cucumbers, chopped onion, and bell pepper. Stir in the vinegar, sugar, and pickling spices. Bring the mixture to a boil, then reduce the heat and let it simmer for about 10 minutes, stirring occasionally.
Step 5: Adjust the Consistency
If the relish appears too watery, continue simmering until the liquid reduces to your desired consistency. Remember, it will thicken slightly as it cools.
Step 6: Sterilize the Jars
While the relish is cooking, sterilize your jars by boiling them in water or running them through a high-heat cycle in the dishwasher.
Step 7: Fill the Jars
Once the relish is done, carefully ladle the hot relish into the sterilized jars, leaving about 1/2 inch of headspace. Use a clean utensil to remove air bubbles and adjust to the correct headspace if necessary.
Step 8: Seal the Jars
Wipe the rims of the jars with a clean, damp cloth to remove any relish residue. Place the lids on the jars and screw on the rings until finger-tight.
Step 9: Process the Jars
Place the filled jars in a boiling water bath canner, ensuring the water covers the jars by at least 1 inch. Bring the water to a boil and process the jars for about 10 minutes (adjust for altitude if necessary).
Step 10: Cool and Store
Carefully remove the jars from the canner and let them cool completely on a towel-lined surface. Check the seals; if the lids are concave and don’t flex when pressed, the jars are sealed.
Notes
Storage
Store the sealed jars in a cool, dark place. The relish is best when allowed to sit for at least a week before opening, allowing the flavors to meld. Once opened, refrigerate the jar and use within a few weeks.
Ingredient Customization
Adjust the ratio of cucumbers, onions, and peppers to suit your taste preferences. You can also experiment with different types of vinegar or add spices like mustard seeds for a unique twist.
Consistency
If you prefer a chunkier relish, chop the vegetables more coarsely. Alternatively, for a smoother texture, process the vegetables further.
Adjusting Sweetness
The amount of sugar can be adjusted to make the relish sweeter or more tangy. Taste as it simmers, and add sugar gradually to achieve the desired flavor.
Safety Tips
Always ensure proper sterilization of jars and lids to prevent contamination. Use tested recipes and guidelines for canning to ensure safe preservation.
“`
“`html
Cook Techniques
Preparation of Cucumbers
Use fresh, firm cucumbers to ensure the best flavor and texture for the relish. Wash and dry them thoroughly before proceeding.
Chopping the Ingredients
Finely chop cucumbers, onions, bell peppers, and any additional vegetables to achieve a uniform texture for your relish. Use a food processor for quick and consistent results, but avoid over-processing into a puree.
Salting the Mixture
Combine the chopped vegetables with salt and let them sit for a specified time to draw out excess moisture. This step helps preserve the crispness of the ingredients.
Draining Excess Liquid
After salting, drain the liquid thoroughly from the vegetable mixture using a fine mesh sieve or cheesecloth. This ensures your relish doesn’t turn watery.
Cooking the Relish
Mix the vegetables with the pickling brine ingredients and simmer the mixture over medium heat. Stir occasionally to ensure the flavors blend well and the mixture thickens slightly.
Canning the Relish
If storing for an extended time, ladle the hot relish into sterilized jars, leaving appropriate headspace. Seal the jars tightly and process them in a boiling water bath for a specified time to ensure proper preservation.
Cooling and Storing
Allow the jars to cool completely at room temperature. Store them in a dark, cool place for long-term use or refrigerate for shorter storage durations.
FAQ
What type of cucumbers should I use?
Use fresh, firm cucumbers. Smaller pickling cucumbers are ideal for making relish due to their crisp texture and limited seeds.
Why do I need to salt the vegetables?
Salting the vegetables helps to draw out excess moisture, which prevents the relish from becoming too watery and enhances its overall texture.
Can I add other vegetables?
Yes, you can customize your relish by adding other vegetables like red bell peppers or carrots for additional flavor and color.
Is it necessary to use a food processor?
No, but a food processor makes chopping the vegetables quicker and ensures a uniform texture. If you prefer, you can finely chop the ingredients by hand.
How long does homemade relish last?
If properly canned and sealed, homemade relish can last up to a year when stored in a dark, cool place. If refrigerated, it generally lasts a few weeks.
Do I need to sterilize the jars?
Yes, sterilizing jars is essential if you plan to store your relish long-term to prevent contamination and spoilage.
Can I adjust the sweetness or tanginess?
Absolutely. You can modify the amount of sugar or vinegar in the recipe to suit your taste preferences.
Can I double the recipe?
Yes, you can scale the recipe up or down as needed. Just maintain the ingredient ratios to ensure the flavors remain balanced.
How can I test if the canning process was successful?
After cooling, check the jar lids for a secure seal. Press down on the lid; it should not flex or make a clicking sound. If it does, the jar hasn’t sealed properly and should be refrigerated.
Can I freeze the relish instead of canning it?
Yes, relish can be frozen in airtight containers. However, freezing may slightly alter its texture compared to canning.
What can I pair dill pickle relish with?
It pairs well with hot dogs, hamburgers, and sandwiches. It also makes a great addition to potato salads, macaroni salads, and tartar sauces.
“`
Conclusion
Making your own homemade dill pickle relish is simple, delicious, and a fantastic way to elevate your dishes. It’s a wonderful accompaniment to a variety of recipes and allows you to enjoy the taste of summer pickles year-round. With just a few basic ingredients and a bit of time, you can create a relish that puts store-bought versions to shame. Try it for a flavor boost in your favorite meals and enjoy the difference homemade makes.
More recipes suggestions and combination
Homemade Tartar Sauce
Pair the dill pickle relish with mayo, lemon juice, and seasonings to create a fresh and zesty tartar sauce perfect for seafood dishes.
Relish-flavored Potato Salad
Add dill pickle relish to your creamy potato salad for a tangy twist that brings your dish to life.
Hot Dogs and Burgers
Top off your hot dogs and burgers with this relish for a classic, flavor-packed finish.
Tuna or Egg Salad
Incorporate the relish into tuna or egg salad for an extra bite of flavor and texture.
Sandwich Spreads
Mix the relish into sandwich spreads for an extra layer of taste, especially in chicken or ham sandwiches.
Grilled Chicken or Fish
Use it as a topping for grilled chicken or fish to add a bright, tangy flavor contrast.
Deviled Eggs
Add a spoonful of dill pickle relish to the filling of deviled eggs for a deliciously tangy twist.
Macaroni Salad
Mix this relish into a macaroni salad for a refreshing crunch and a savory kick.
Charcuterie Boards
Serve the dill pickle relish as part of your charcuterie board for an unexpected, flavorful condiment option.