Hearty Chili Con Carne
Introduction
Recipe and More
Chili con carne, a warm and comforting dish, has remained a favorite around the world, offering a spicy, hearty meal that is perfect for entertaining guests or simply enjoying on a cold evening. This recipe delivers a pot of rich, flavorful chili that combines well-balanced spices, tender meat, and a mixture of savory ingredients, making it a delightful dish for any occasion.
Detailed Ingredients with Measures
A Flavorful Mix
Ground beef – 1 pound
Large onion, diced – 1
Garlic cloves, minced – 3
Tomato paste – 2 tablespoons
Canned chopped tomatoes – 1 can (14 ounces)
Beef broth – 1 cup
Red kidney beans, drained and rinsed – 1 can (15 ounces)
Chili powder – 2 tablespoons
Cumin – 1 teaspoon
Paprika – 1 teaspoon
Salt – 1 teaspoon
Black pepper – ½ teaspoon
Sugar – 1 teaspoon
Olive oil – 2 tablespoons
Prep Time
Getting it Ready
Preparing for this rewarding dish is simple and takes just a short amount of time. In about 20 minutes, you can assemble, dice, and mix everything needed before letting the cooking process unfold.
Cook Time, Total Time, Yield
Every Minute Worth It
The cook time for chili con carne is around 1 hour, as the rich flavors develop and come together perfectly. Adding both preparation and cooking time, the total time comes to approximately 1 hour and 20 minutes. This meal yields about 4 generous servings, making it perfect for a family dinner or leftovers for the next day.
Enjoy creating this comforting chili con carne in your kitchen and savor every delicious bite!
Detailed Directions and Instructions
Step 1: Start by Preparing the Ingredients
Chop all vegetables, including onions, garlic, and any additional preferred vegetables, into small, even pieces. Rinse and prepare your beans if using fresh or canned varieties, making sure they’re ready to use during the cooking process.
Step 2: Cook the Vegetables
Heat a large pot or Dutch oven on medium heat. Add a drizzle of oil and sauté the chopped onions and garlic until softened and fragrant. Stir occasionally to prevent burning.
Step 3: Brown the Ground Meat
Add the ground beef (or preferred meat) to the pot with the sautéed vegetables. Break up the meat using a spoon or spatula as it begins to brown. Ensure it cooks evenly, and stir until no pink remains.
Step 4: Add the Spices
Sprinkle your chosen chili seasoning spices over the browned meat and vegetables. Mix well to evenly coat the meat and ensure the spices are incorporated thoroughly for maximum flavor.
Step 5: Pour in Tomatoes and Liquid
Add the canned or fresh tomatoes to the pot. Pour in any necessary stock, water, or additional liquids as per your preference or recipe instructions, ensuring there’s enough to achieve the desired consistency. Stir to combine.
Step 6: Simmer the Chili
Reduce the heat to low, cover the pot, and let the chili simmer gently for 30 minutes to 1 hour (or longer if desired). Stir occasionally to avoid sticking and ensure the flavors meld together properly.
Step 7: Incorporate Beans
If using beans, add them to the pot during the last 20 minutes of simmering. Stir them into the mixture gently to combine without breaking them apart.
Step 8: Adjust Seasonings
Taste the chili and adjust the seasoning if necessary. Add more salt, chili powder, or any other spices or herbs to enhance the flavor according to preference.
Step 9: Serve the Chili
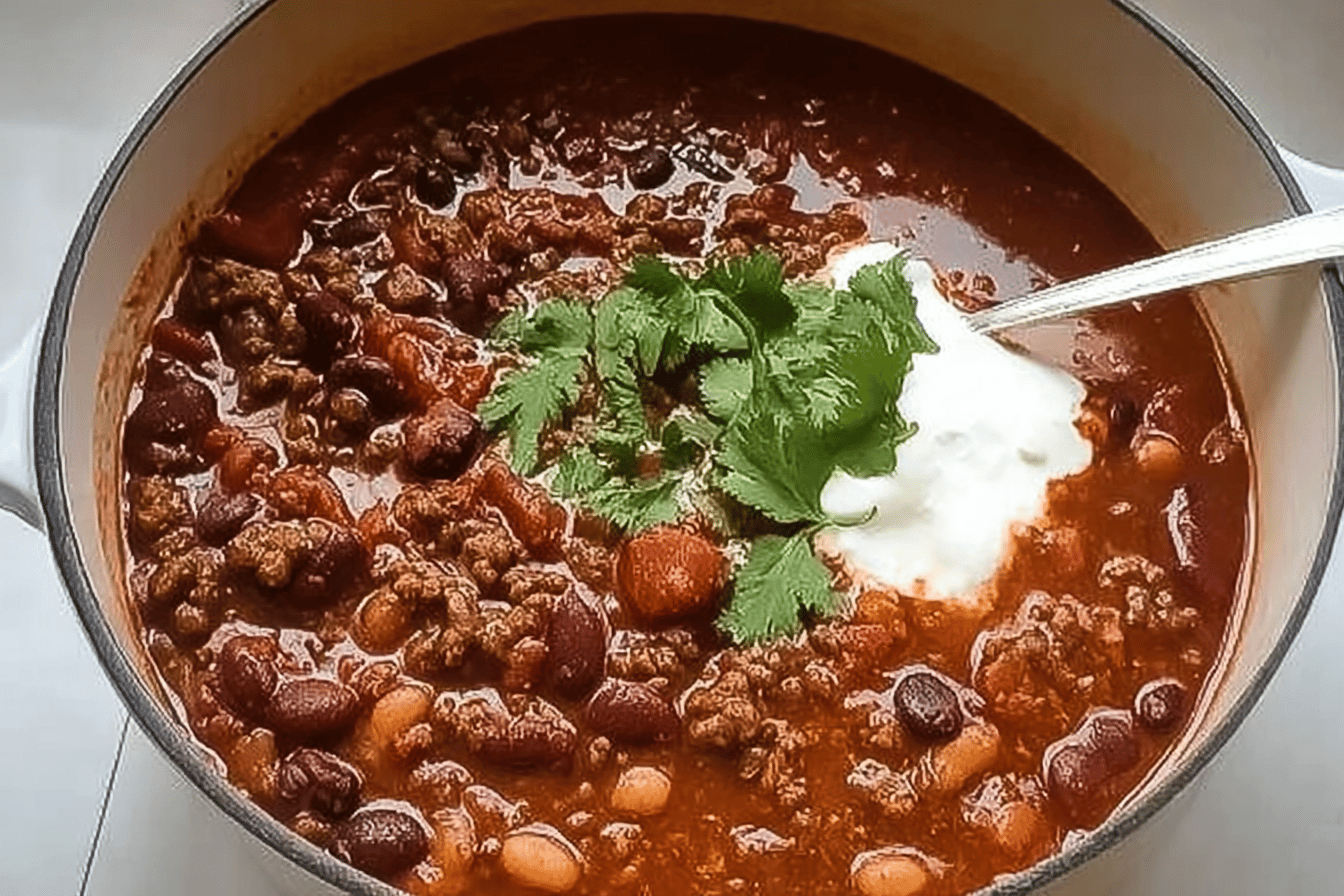
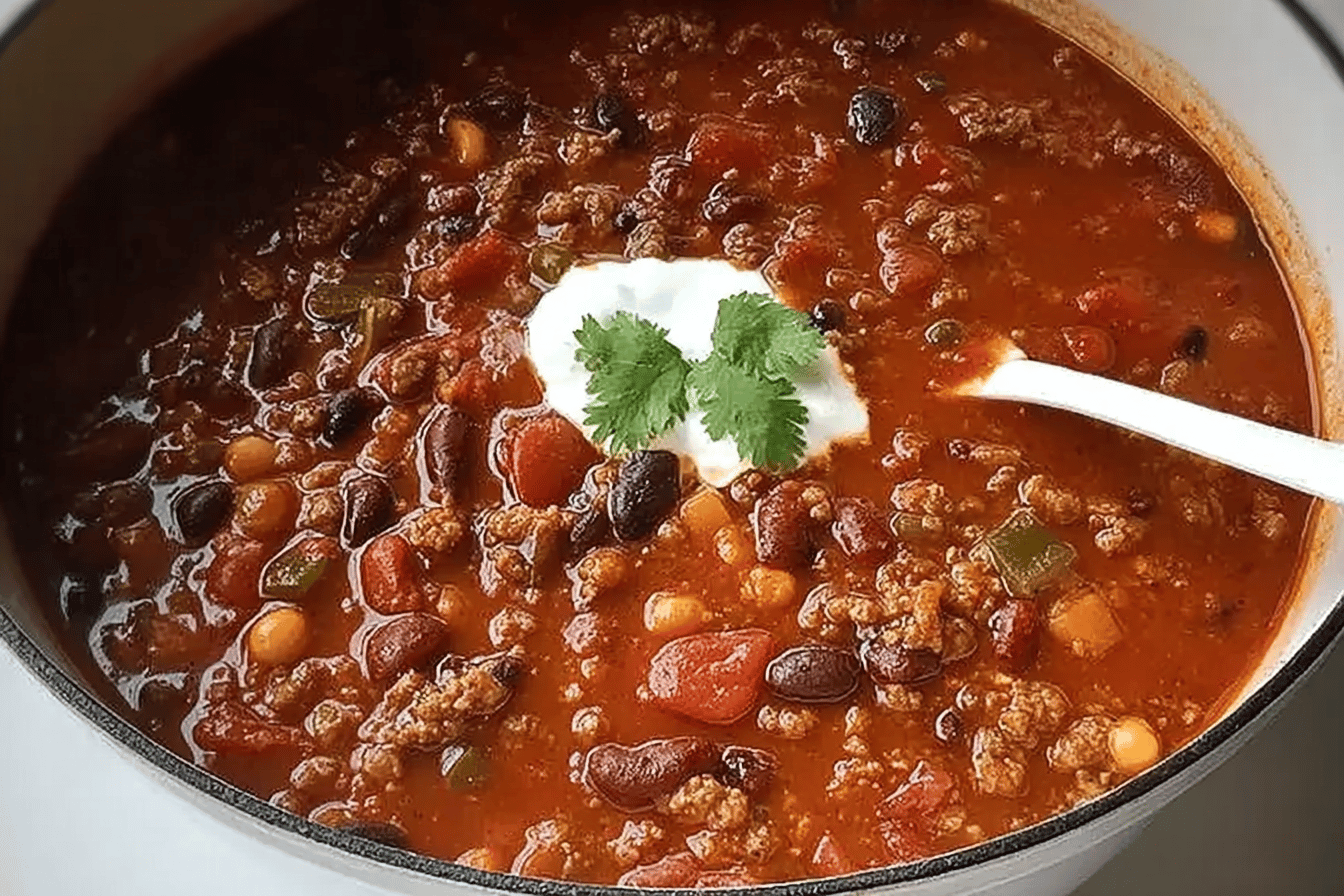
Once the chili has reached your preferred consistency and flavor, remove it from heat. Serve hot in bowls, garnished with toppings like shredded cheese, sour cream, fresh cilantro, or diced jalapeños.
Notes
Note 1: Spice Level Adjustments
Adjust the spice level according to your taste by adding more chili powder, fresh chilies, or hot sauce for extra heat, or use mild ingredients for a less spicy chili.
Note 2: Bean Options
While traditional chili often includes kidney beans, feel free to substitute or add black beans, pinto beans, or leave them out entirely for a beanless chili.
Note 3: Simmering Time
The longer you allow the chili to simmer, the more the flavors will deepen. Aim for at least 30 minutes of simmering, but feel free to leave it for an hour or more for an even richer flavor.
Note 4: Make-Ahead Option
Chili tends to taste even better the next day as the flavors have more time to develop. Make it a day in advance and store it in the refrigerator for optimal taste.
Note 5: Storage Suggestions
Store leftovers in an airtight container in the refrigerator for up to 4 days. This chili can also be frozen for up to 3 months in portioned freezer-safe containers.
Note 6: Substitutions
Feel free to substitute the ground beef with ground turkey, chicken, or make it vegetarian by using plant-based meat alternatives or omitting the meat entirely.
Note 7: Topping Variations
Experiment with toppings like diced avocado, tortilla chips, hot sauce, or a dash of lime juice to complement the chili to your taste.
Cook Techniques
Proper Meat Browning
Achieve a rich flavor by thoroughly browning your ground beef. Use a heavy-bottomed pan on medium-high heat, stirring occasionally to break the meat into small pieces. Allow the edges to develop a deep brown color without burning, as this step enhances depth of flavor.
Layering Spice Flavors
Add your spices in layers instead of all at once. Begin by incorporating spices during the meat browning stage, then add more as the other ingredients are stirred in. This technique helps build a blend of flavors that complement the dish.
Simmering for Perfect Texture
Let your chili simmer at a low heat for at least 30 minutes. During this time, the flavors meld together beautifully, and the sauce thickens into a hearty consistency. Stir occasionally to ensure even cooking and prevent sticking.
Balancing Heat Levels
For a balanced spice level, incorporate chili powder and adjust with cayenne pepper sparingly. Taste frequently as you cook to find the perfect heat for your palate.
Achieving the Perfect Consistency
If the chili becomes too thick during simmering, you can adjust the consistency by adding small amounts of broth, water, or crushed tomatoes. Stir thoroughly and allow the mixture to settle before adding more liquid.
FAQ
Can I use a different type of meat?
Yes, you can substitute beef with ground turkey, chicken, or pork, depending on your preference. Keep in mind that different meats may alter the chili’s flavor profile slightly.
What can I do if my chili is too spicy?
If your chili turns out too spicy, add a dairy product such as sour cream, plain yogurt, or a splash of milk to tone down the heat. Alternatively, incorporate a bit of sugar or extra tomatoes to balance the spice levels.
Can I make chili con carne ahead of time?
Yes, this dish is an excellent choice for meal prep. Chili con carne tastes even better the next day as the flavors have more time to meld. Simply store it in an airtight container in the refrigerator or freezer and reheat when ready to serve.
How can I thicken my chili if it’s too thin?
If your chili is too thin, allow it to simmer uncovered to reduce the liquid. You can also mix a small amount of cornstarch or flour with water to create a slurry and stir it into the chili to achieve the desired thickness.
What toppings pair best with chili con carne?
Popular toppings include shredded cheese, sour cream, chopped onions, tortilla chips, or fresh cilantro. Feel free to garnish based on your preferences for added texture and flavor.
Is chili con carne gluten-free?
The recipe can be made gluten-free, as long as all ingredients, such as the broth and spices, are verified to be free of gluten-containing additives. Always check product labels to confirm.
“`html
Conclusion
Chili Con Carne is a timeless dish that warms not only the stomach but also the soul. Its rich combination of flavors, hearty ingredients, and comforting spices makes it a favorite for gatherings, family meals, or just a cozy night in. Whether served on its own, with a side of rice, or paired with bread, this recipe is versatile and endlessly satisfying. Take the time to experiment and add your own twist—you’ll soon discover the joys of this comforting classic.
More Recipes Suggestions and Combination
Homemade Cornbread
Pair your Chili Con Carne with moist, golden homemade cornbread. The sweet and savory notes of cornbread make it the perfect companion to balance the spiciness of the chili.
Baked Potatoes
Use Chili Con Carne as a hearty topping for baked potatoes. Top with shredded cheese, sour cream, and fresh chives for a fulfilling and satisfying meal.
Chili Mac
Combine your Chili Con Carne with macaroni for a twist on classic comfort food. This combination creates a cheesy, hearty, and deliciously filling dish.
Nachos
Layer tortilla chips with Chili Con Carne, melted cheese, guacamole, jalapeños, and a dollop of sour cream. Perfect as a party snack or a fun dinner idea.
Stuffed Bell Peppers
Take large bell peppers, hollow them out, and stuff them with Chili Con Carne. Bake until the peppers are tender for a comforting and unique variation of your chili recipe.
“`