Oreo Dessert Cups
Introduction
No-bake Oreo dessert cups are the perfect sweet treat for any occasion. With their creamy filling and crunchy cookie layers, these delightful cups combine simplicity with indulgence. Whether you’re hosting a party or looking for a quick dessert to satisfy your sweet tooth, this recipe is easy to follow and absolutely delicious.
Detailed Ingredients with measures
– Oreo cookies: 24 cookies
– Cream cheese: 8 oz, softened
– Powdered sugar: 1 cup
– Whipped topping: 8 oz, thawed
– Vanilla extract: 1 teaspoon
– Additional Oreos for garnishing: 5-6 cookies
Prep Time
15 minutes
Cook Time, Total Time, Yield
Cook Time: 0 minutes
Total Time: 15 minutes
Yield: 6 dessert cups
These no-bake Oreo dessert cups are not only quick to prepare but also offer a delightful blend of textures and flavors, making them a hit among all ages. Enjoy the ease of assembling this treat, and let it chill in the fridge for the ultimate dessert experience!

Detailed Directions and Instructions
Step 1: Prepare the Oreo Crust
Crush the Oreo cookies into fine crumbs using a food processor or a ziplock bag and a rolling pin. Make sure to separate the cream filling from the cookies if desired, although it’s okay to keep it mixed in for added flavor.
Step 2: Combine Oreo Crumbs and Butter
In a mixing bowl, combine the crushed Oreo cookies with melted butter. Mix until the crumbs are evenly coated and the mixture resembles wet sand.
Step 3: Layer the Crust in Cups
Spoon the Oreo crust mixture into the bottom of dessert cups, pressing down firmly to form an even layer. Set aside while preparing the filling.
Step 4: Create the Cream Cheese Mixture
In a separate bowl, beat cream cheese until smooth. Gradually add powdered sugar, vanilla extract, and whipped cream, mixing until fully combined and fluffy.
Step 5: Assemble the Dessert Cups
Spoon or pipe the cream cheese mixture over the Oreo crust layer in the dessert cups. Smooth the tops with a spatula for an even finish.
Step 6: Add Additional Toppings
Crush additional Oreo cookies if desired and sprinkle over the cream cheese layer. You can also add chocolate syrup, whipped cream, or chocolate chips for extra flavor and decoration.
Step 7: Chill the Dessert Cups
Refrigerate the assembled dessert cups for at least 2 hours to allow them to set before serving.
Step 8: Serve and Enjoy
Remove the dessert cups from the refrigerator and serve chilled. Enjoy your delicious no-bake Oreo dessert cups!
Notes
Note 1: Cream Cheese Temperature
Ensure the cream cheese is at room temperature to make it easier to blend and achieve a smooth texture.
Note 2: Gluten-Free Option
Consider using gluten-free Oreo cookies if necessary for a gluten-free dessert version.
Note 3: Storage Recommendations
Store leftover dessert cups in the refrigerator for up to 3 days. Keep covered to maintain freshness.
Note 4: Customization Suggestions
Feel free to customize layers with different types of cookies or add fruits like raspberries or strawberries for a unique twist.

Cook techniques
Creaming
Creaming is a technique used to blend butter and sugar together until the mixture is light and fluffy. This helps to aerate the dessert, resulting in a light texture.
Layering
Layering involves placing the ingredients in a specific order to create visually appealing and flavorful combinations. In this dessert, it enhances the overall presentation and taste.
Chilling
Chilling is crucial for setting the dessert. It allows the layers to firm up and makes serving easier. Ensure adequate chilling time for optimal results.
FAQ
Can I use a different type of cookie instead of Oreos?
Yes, you can substitute Oreos with any similar cookie for a different flavor profile.
How long can I store the no-bake Oreo dessert cups?
You can store them in the refrigerator for up to 3 days for the best taste and texture.
Is it possible to make this dessert gluten-free?
Absolutely! Use gluten-free cookies and ensure your other ingredients are gluten-free as well.
Can I add other ingredients to the recipe?
Yes, feel free to add ingredients like fruit or nuts to enhance the flavors and textures.
Do I need to use heavy cream for the dessert?
Heavy cream is recommended for a richer and creamier texture, but you can experiment with alternatives if desired.

Conclusion
The No-Bake Oreo Dessert Cups are a delightful treat that combines the rich flavors of Oreos with a creamy filling, making them perfect for any occasion. Their simple preparation and indulgent taste make them a hit among both children and adults. Whether you’re hosting a party or enjoying a quiet night in, these dessert cups will certainly satisfy your sweet tooth and impress your guests.
More recipes suggestions and combination
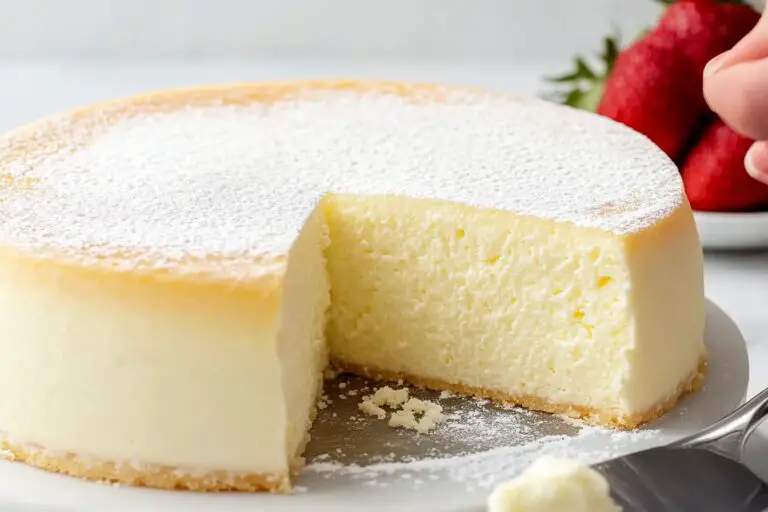
Oreo Cheesecake
Indulge in the creamy richness of a no-bake Oreo cheesecake, where the classic flavors of cookies and cream are transformed into a luscious dessert that’s easy to make and delightful to eat.
Chocolate Mousse Cups
Create a rich chocolate mousse and layer it with crumbled Oreos for a decadent dessert cup that brings together the best of two delicious worlds.
Banana Cream Pie Cups
Combine sliced bananas with a creamy banana pudding and crumbled Oreos for a fruity twist on the traditional dessert, perfect for those who love tropical flavors.
Peanut Butter Cookie Cups
Mix creamy peanut butter with whipped cream and layer it with Oreo crumbles to satisfy any peanut butter lover’s cravings.
Strawberry Shortcake Cups
Layer fresh strawberries and whipped cream with crumbled Oreos for a unique spin on the classic strawberry shortcake, offering both sweetness and crunch in every bite.