How to Make Slutty Brownies: The Ultimate Guide
Craving a dessert that combines cookies, brownies, and pure indulgence? Meet slutty brownies—a viral treat stacking chewy cookie dough, crunchy Oreos, and fudgy brownie batter into one irresistible dessert. This guide walks you through creating a scratch-made version that’s richer and more satisfying than basic box mixes.
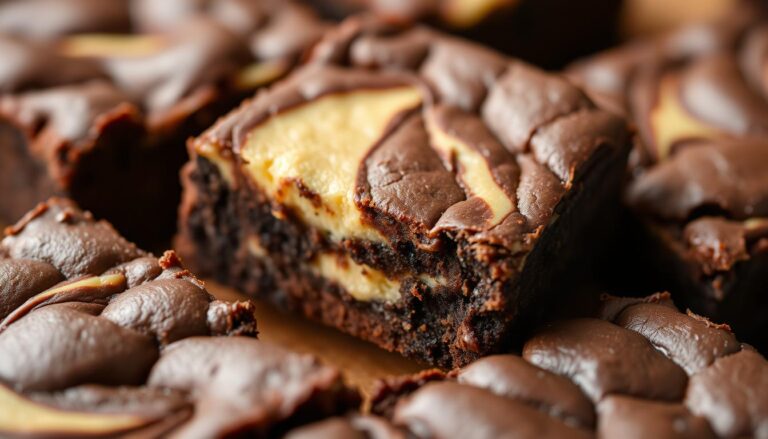
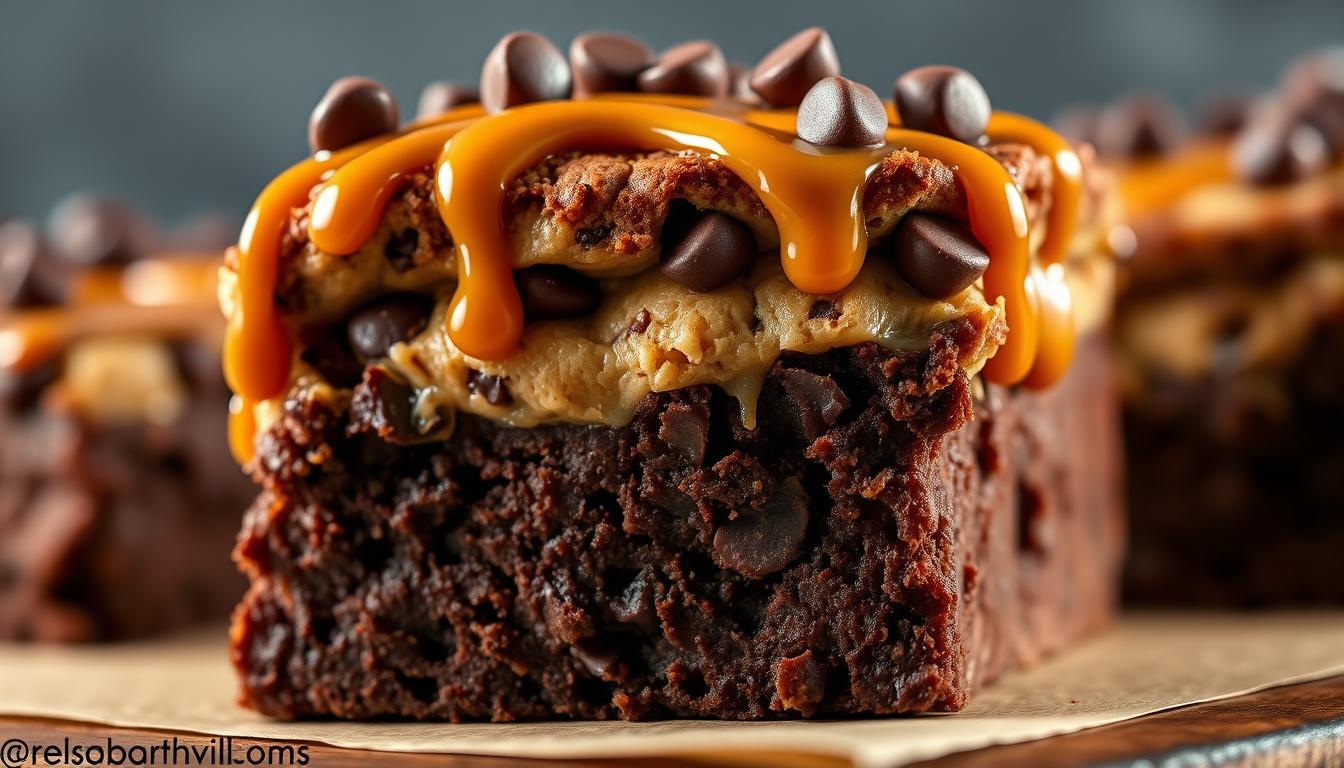
What sets this recipe apart? It’s all about the three perfect layers. A buttery cookie base forms the foundation, followed by a row of Oreos for that iconic crunch. The top layer? A decadent homemade brownie batter that bakes into a glossy, crackly crust.
Originally popularized as a quick hack using pre-made dough, this upgraded version lets you control every detail. You’ll learn how to balance textures and flavors while avoiding common pitfalls like underbaked centers or uneven layers.
Key Takeaways
- Slutty brownies combine cookie dough, Oreos, and brownie batter in one pan
- This guide focuses on entirely scratch-made ingredients for superior flavor
- The dessert’s popularity stems from its contrasting textures and visual appeal
- Oreos add a signature crunch between the soft cookie and fudgy brownie layers
- Techniques like proper layering ensure even baking results
- Upcoming sections break down equipment needs and ingredient ratios
Introduction to Slutty Brownies
What happens when chocolate chip cookies, Oreos, and fudgy brownies collide? You get a dessert that’s as bold in flavor as it is in texture. These layered bars break every rule of traditional baking by stacking three iconic treats into one unforgettable bite.
What Makes These Layered Brownie Bars Unique
The magic lies in the contrast. A soft cookie dough base—packed with chocolate chips—anchors the dessert. Oreos add a crisp middle layer, while a rich brownie batter crowns the creation. Unlike single-texture treats, each forkful delivers chewy, crunchy, and melt-in-your-mouth sensations.
Early versions relied on box mixes, but scratch-made cookie dough and homemade brownies elevate the flavor. The chocolate chip cookie layer stays tender, while the Oreos retain their snap even after baking. This balance turns a simple concept into a showstopper.
The Rise in Popularity and Its Origins
Food bloggers first shared the recipe in 2011, dubbing it “slutty” for its indulgent layers. Pinterest users quickly spread it, with posts calling the bars “sinfully delicious.” By 2013, the dessert appeared on cooking shows, cementing its status as a modern classic.
Today, bakers tweak the formula—using gluten-free cookie dough or swapping Oreos for other cookies. But the core idea remains: three textures, one pan, endless satisfaction. Ready to build your own? Let’s break down the essentials.
Ingredients and Essential Equipment
Every great dessert starts with the right building blocks. For these layered bars, you’ll need classic chip cookie ingredients: butter, brown and white sugar, vanilla, and chocolate chips. The brownie layer demands cocoa powder and chopped dark chocolate, while Oreos provide the crunch.
Quality matters here. Unsalted butter lets you control salt levels, while fresh eggs bind layers evenly. Use a 9×9-inch baking pan—non-stick or lined with parchment—to prevent sticking. Metal pans bake faster than glass, ensuring crisp edges.
Professional bakers swear by precise measurements. For the chip cookie base: 1 cup butter, ¾ cup each of granulated and brown sugar, plus 2 eggs. A stand mixer creates smooth dough, but a hand mixer works too. Short on time? Swap homemade brownie batter for a 18-oz box mix.
Don’t skip these tools:
- Rubber spatula for scraping bowls
- Offset spatula to spread layers
- Oven thermometer for accuracy
With these ingredients and tools, you’re ready to build dessert magic. Choose scratch-made elements for depth or combine shortcuts for speed—either way, that baking pan will deliver gooey perfection.
Preparing the Cookie Dough Layer
The foundation of any great layered dessert lies in its base. For these bars, that means crafting a chocolate chip cookie layer sturdy enough to support the other components but soft enough to melt in your mouth. Start by creaming room-temperature butter with both brown and white sugar until fluffy—this traps air for lift.
Add eggs one at a time, mixing thoroughly after each. A splash of vanilla extract enhances flavor without overpowering. When you add flour, do it gradually—pouring all at once creates lumps. Stop mixing once no dry streaks remain; overworking the dough makes it tough.
Spread the cookie dough evenly in your pan using these tricks:
- Dampen your fingers to press dough without sticking
- Use a flat-bottomed cup to smooth surfaces
- Check edges for consistent thickness
This base bakes slightly before adding other layers, so precision matters. A perfectly leveled dough ensures even heat distribution. Remember: this foundation determines whether your bars slice neatly or crumble.
Pro tip: Chill the cookie dough for 15 minutes if it feels too sticky. Cold butter firms up, making spreading easier. Now you’re ready to build upward—layer by glorious layer.
Assembling the Oreo Layer
The middle layer is where crunch meets gooey perfection. Oreo cookies form the structural heart of these bars, creating a crisp contrast between the soft cookie dough bottom and rich brownie top. How you arrange them determines whether every bite delivers balanced texture.
Start by placing whole Oreos in straight rows across your pan. Avoid overlapping—cookies should lie flat like puzzle pieces. Gently press each one into the cookie dough bottom until they sit halfway submerged. This anchors them while baking and prevents floating.
Need to fill gaps? Break cookies cleanly along their creases. Fit the pieces snugly between whole Oreos to maintain coverage. Uneven spacing creates weak spots where brownie batter might sink through.
Follow these instructions for best results:
- Work from the center outward
- Keep cookies ¼-inch from pan edges
- Wipe crumbs off fingers to prevent sticking
A seamless Oreo layer ensures structural integrity. Test it by lightly tapping the pan—cookies shouldn’t shift. Now you’re ready for the grand finale: pouring that fudgy brownie batter over your edible mosaic.
Mastering the Brownie Batter
The crowning glory of this layered dessert lies in its brownie batter—a velvety blend that transforms into a fudgy masterpiece. Begin by preheating your oven to 350°F while preparing the mixture. Room-temperature eggs and melted chocolate ensure smooth integration of ingredients.
Melt high-quality dark chocolate using a double boiler, stirring until glossy. Sift cocoa powder twice to eliminate lumps before folding it into the batter. Professional bakers recommend mixing by hand once dry and wet ingredients combine—overbeating creates cake-like textures instead of dense richness.
When ready to pour brownie batter over the Oreo layer, tilt the pan gently as you distribute it. Use an offset spatula to push the mixture toward edges without disturbing cookies beneath. The ideal thickness? About ¼-inch above the Oreos for balanced layering.
Timing matters most after sliding the pan into your oven 350°F preheated environment. Set a timer for 5 minutes less than your recipe suggests—the cookie base continues cooking while the brownie batter sets. Pull the bars when the top develops cracks but still jiggles slightly at the center.
Essential Tips for Perfect Slutty-Brownies
Achieving bakery-quality results requires precision and patience. Start by setting your timer to 35-38 bake minutes at 350°F—this sweet spot prevents dry edges while keeping centers fudgy. “The top should crack slightly but still jiggle when nudged,” advises pastry chef Maria Gomez. Use a toothpick test: crumbs should cling lightly without wet batter.

Cooling time is non-negotiable. Let the pan rest 45 minutes before slicing—this allows the cookies and brownie layers to firm up. Rushing this step causes messy collapses. For clean cuts, chill bars for 20 minutes after cooling, then use a warm knife.
Elevate your creation with toppings. Sprinkle chocolate chips over warm bars so they melt slightly. Add a scoop of vanilla ice cream for contrast, or drizzle caramel between layers before baking.
Manage your total time wisely: prep layers in advance, and preheat the oven while assembling. To make slutty brownies structurally sound, press Oreos firmly into the cookie base. Balance textures by chopping cookies into the brownie batter for extra crunch.
Remember: the magic lies in contrasts. Follow these steps to make slutty brownies that hold their shape while delivering gooey, crispy, and creamy bites in every forkful.
Variations and Serving Suggestions
Transform your dessert game with creative twists on this layered classic. Swap standard Oreos for peppermint or birthday cake versions during holidays. For the cookie dough base, try peanut butter chips or white chocolate chunks instead of traditional chocolate chips. A dash of espresso powder in the brownie batter adds depth, while orange zest pairs perfectly with dark chocolate.
Serve warm bars with a scoop of vanilla bean ice cream or drizzle melted caramel across the top. For gatherings, cut into bite-sized squares and skewer with fresh berries. Leftovers? Crumble them into a bowl with yogurt for breakfast parfaits or layer with pudding for trifles.
Storage tips keep your treats fresh:
- Cool completely before placing in an airtight bowl
- Refrigerate up to 5 days for fudgy texture
- Freeze slices between parchment paper for 3-month storage
Adjust the recipe without losing structure: reduce vanilla extract by half if using flavored Oreos. Substitute ¼ cup flour with cocoa powder for double-chocolate cookie layers. Reheat frozen portions in a 325°F oven for 10 minutes to revive that fresh-from-the-baking-pan magic.
Conclusion
Mastering this layered dessert requires balancing textures and flavors at every stage. Make sure your cookie dough spreads evenly in the pan, creating a sturdy base for crisp Oreos and rich brownie batter. Quality matters—use unsalted butter for better flavor control and fresh eggs to bind layers seamlessly.
Timing is key. Bake at 350°F for 35-38 minutes, checking for a crackly brownie layer with a slightly jiggly center. Let the dessert cool completely before slicing—this ensures clean layers hold their shape.
Follow your favorite brownie recipe precisely, and don’t rush chilling steps. The right sugar ratios in both dough and batter guarantee that signature chewiness. Arrange Oreos snugly to prevent sinking, and spread batter gently to protect the middle layer.
With attention to detail, you’ll create a showstopping treat where every bite delivers soft cookie, crunchy cookie, and fudgy brownie perfection. Now grab your pan and bake with confidence!
FAQ
Can I use store-bought cookie dough for slutty brownies?
Yes! Pre-made chocolate chip cookie dough works well for the bottom layer. Just press it evenly into the baking pan before adding Oreos and brownie batter. For best results, use a dough with a soft texture to ensure even baking.
How do I prevent the layers from blending together?
Press the cookie dough firmly into the pan to create a compact base. Place Oreo cookies in a single layer without overlapping. Pour brownie batter gently over the cookies to avoid shifting them. Bake at 350°F for optimal layer separation.
Can I substitute the Oreos with other cookies?
Absolutely! Try using Nutter Butter, Chips Ahoy, or gluten-free cookies. Avoid overly crumbly options, as they might break during assembly. Adjust baking time slightly if using thicker cookies.
How do I know when slutty brownies are fully baked?
Insert a toothpick into the brownie layer. If it comes out with a few moist crumbs (not wet batter), they’re done. The edges should pull away slightly from the pan. Overbaking can dry out the cookie dough layer.
Can I make these brownies egg-free?
Yes. Replace eggs in the brownie batter with substitutes like applesauce, mashed banana, or commercial egg replacers. Check that your cookie dough is also egg-free if needed. Texture may vary slightly.
How long do slutty brownies stay fresh?
Store them in an airtight container at room temperature for up to 3 days. For longer storage, freeze slices wrapped in plastic for up to 2 months. Thaw at room temperature before serving.
Can I add nuts or caramel to the layers?
Definitely! Sprinkle chopped walnuts or pecans into the cookie dough or brownie batter. Drizzle caramel or peanut butter between layers for extra richness. Adjust baking time if adding wet ingredients.
Why did my brownie layer sink into the Oreos?
This happens if the brownie batter is too thin or poured too forcefully. Use a thick batter (like box-mix consistency) and spread it gently with a spatula. Chilling the cookie dough layer first can also help.