The Ultimate Guide to No-Bake Peanut Butter Cheesecake Balls
Introduction
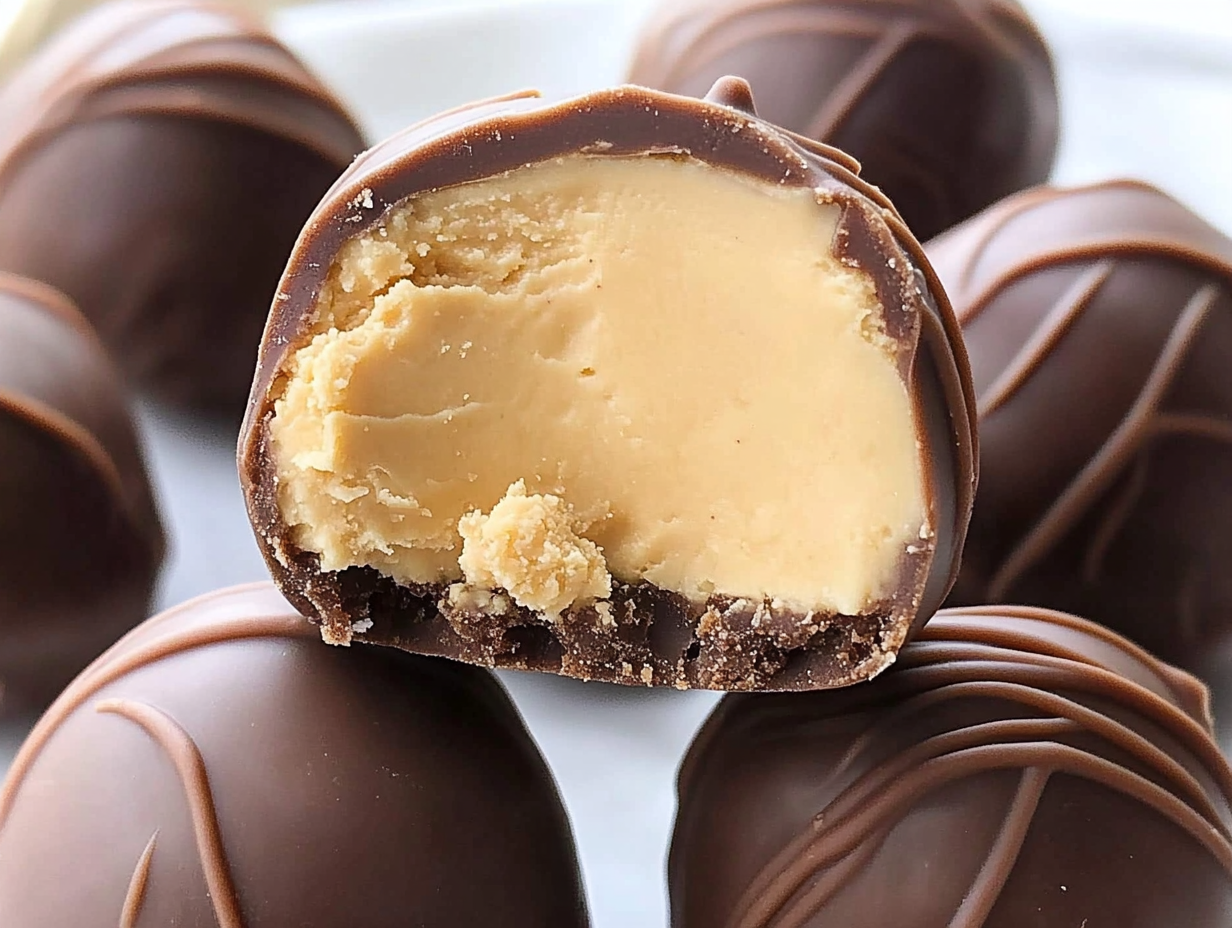
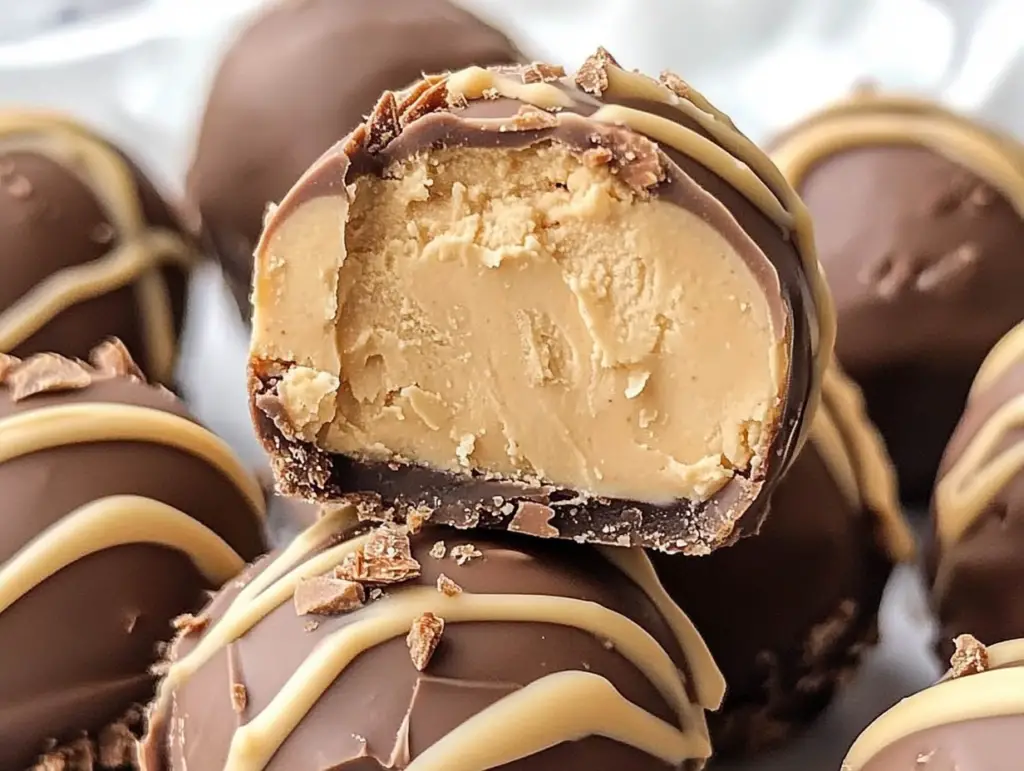
In the world of desserts, few combinations are as beloved as peanut butter and chocolate. When you add the creamy richness of cheesecake to this classic duo, you create something truly magical. Our No-Bake Peanut Butter Cheesecake Balls are the perfect blend of these flavors, creating bite-sized pieces of heaven that are surprisingly easy to make. Whether you’re planning a party, looking for a holiday treat, or simply craving something sweet, these delectable treats are sure to impress.
Why This Recipe Works
The success of these No-Bake Peanut Butter Cheesecake Balls lies in their perfect balance of flavors and textures. The cream cheese provides a rich, tangy base that complements the sweet, nutty peanut butter, while the graham cracker crumbs add just the right amount of texture. The chocolate coating not only adds another layer of flavor but also seals in the creamy filling, making these treats both delicious and portable.
The History of Cheesecake Balls
While traditional cheesecake dates back to ancient Greece, cheesecake balls are a modern invention that combines the beloved dessert with the convenience of bite-sized treats. This particular variation, featuring peanut butter, emerged from the American love affair with peanut butter desserts, creating a perfect fusion of classic cheesecake and beloved comfort food flavors.
Essential Ingredients
For the Filling
- Cream Cheese: The foundation of our cheesecake balls, providing that classic tangy flavor and creamy texture. Always use full-fat cream cheese for the best results.
- Peanut Butter: Choose a commercial creamy peanut butter for consistent results. Natural peanut butter can separate and affect the texture.
- Powdered Sugar: Also known as confectioner’s sugar, it sweetens while maintaining a smooth texture.
- Vanilla Extract: Use pure vanilla extract for the best flavor.
- Salt: A crucial ingredient that enhances all the flavors.
- Graham Cracker Crumbs: Provides structure and that classic cheesecake crust flavor.
For the Coating
- Chocolate Melting Wafers: Specifically designed for coating, these provide the best results.
- Coconut Oil: Helps achieve the perfect chocolate coating consistency.
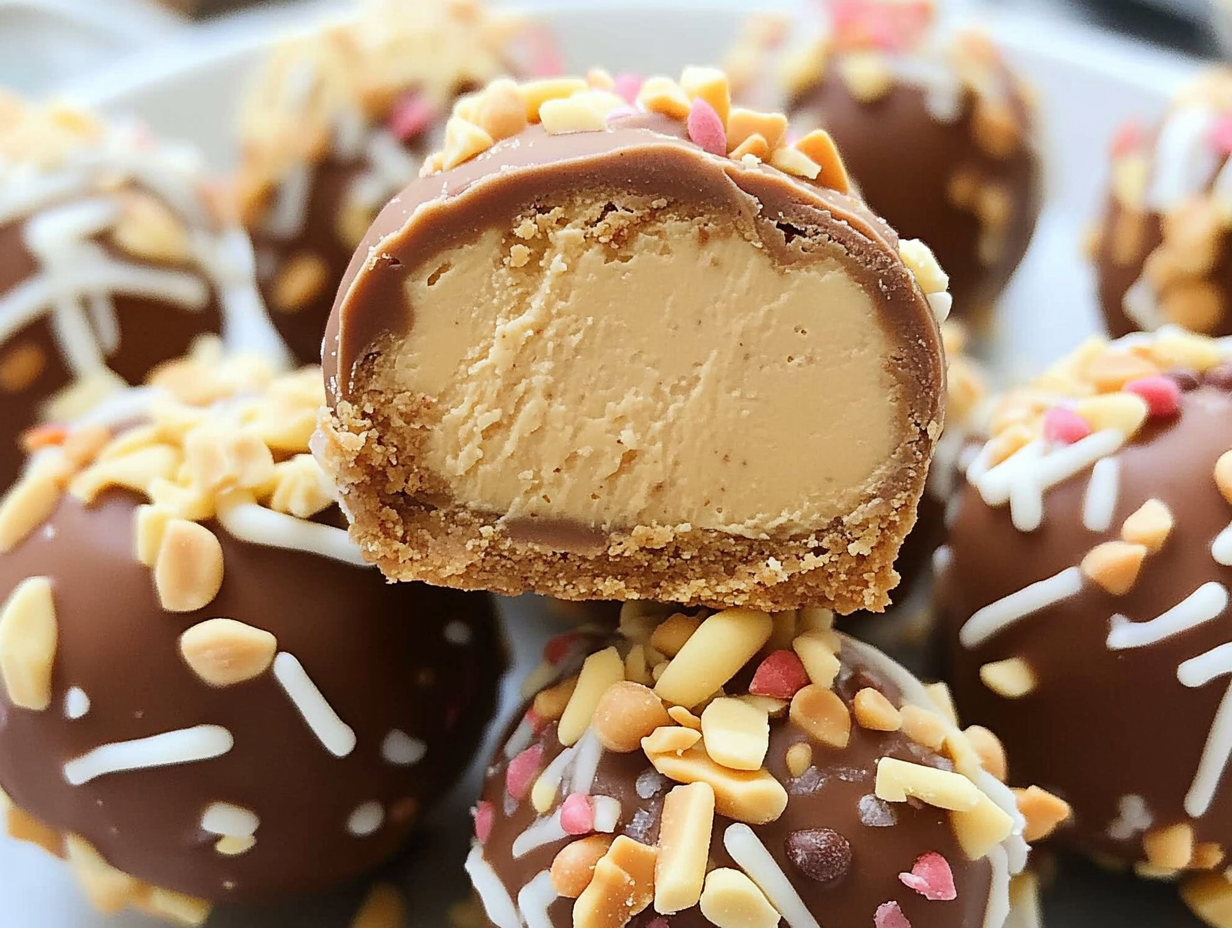
- Optional Decorative Elements: White chocolate, crushed peanuts, or additional graham cracker crumbs.
 Essential Equipment
Must-Have Tools
- Large mixing bowl
- Electric mixer (stand or hand)
- Cookie scoop or tablespoon
- Baking sheets
- Parchment paper
- Microwave-safe bowl
- Dipping tools or forks
- Cooling rack
- Airtight storage containers
Optional but Helpful
- Silicon mat
- Candy thermometer
- Double boiler
- Piping bags for decoration
- Mini cupcake liners for serving
Detailed Step-by-Step Instructions
Preparing the Filling
- Cream Cheese Preparation
- Begin with room temperature cream cheese
- Beat until completely smooth (2-3 minutes)
- Scrape bowl sides frequently
- Adding Peanut Butter
- Incorporate room temperature peanut butter
- Beat until fully combined
- Ensure no streaks remain
- Sweetening the Mixture
- Gradually add powdered sugar
- Mix in vanilla extract and salt
- Beat until smooth and creamy
- Incorporating Structure
- Fold in graham cracker crumbs
- Mix until just combined
- Avoid overmixing
Forming the Balls
- Initial Chilling
- Refrigerate mixture for 30 minutes
- This makes it easier to handle
- Portioning
- Use a cookie scoop for uniform size
- Aim for 1-inch diameter balls
- Clean scoop between portions
- Rolling Technique
- Use slightly damp hands
- Roll quickly to prevent warming
- Place on lined baking sheet
- Freezing Step
- Freeze balls for 1 hour minimum
- Can freeze overnight if needed
- Keep frozen until coating
The Coating Process
- Chocolate Preparation
- Melt chocolate with coconut oil
- Use double boiler or microwave
- Maintain proper temperature
- Dipping Technique
- Work with small batches
- Keep others frozen
- Use dipping tool or fork
- Setting the Coating
- Tap off excess chocolate
- Add toppings immediately
- Allow to set completely
 Expert Tips for Success
Temperature Control
- Keep ingredients at proper temperature
- Work quickly when rolling
- Maintain chocolate temperature
- Store appropriately
Texture Perfection
- Beat cream cheese thoroughly
- Don’t overmix after adding crumbs
- Roll balls uniformly
- Ensure proper coating consistency
Coating Success
- Use quality chocolate
- Add coconut oil for shine
- Keep balls frozen
- Work in small batches
Variations and Creative Ideas
Flavor Variations
- Chocolate Lover’s Version
- Add cocoa powder to filling
- Use chocolate graham crackers
- Double chocolate coating
- Nutty Delight
- Use crunchy peanut butter
- Add chopped nuts
- Roll in crushed peanuts
- Cookie Butter Twist
- Replace peanut butter with cookie butter
- Use speculoos cookies for crumbs
- Add caramel drizzle
Coating Options
- Classic Chocolate
- Dark chocolate
- Milk chocolate
- White chocolate
- Decorative Finishes
- Chocolate drizzle
- Colored candy melts
- Edible glitter
- Textured Coatings
- Crushed nuts
- Cookie crumbs
- Coconut flakes
Storage and Make-Ahead Tips
Short-Term Storage
- Keep refrigerated
- Use airtight container
- Layer with parchment
- Consume within 1 week
Long-Term Storage
- Freeze for up to 3 months
- Wrap individually
- Thaw in refrigerator
- Avoid temperature fluctuations
Transportation Tips
- Keep cold during transport
- Use sturdy containers
- Avoid stacking
- Consider individual packaging
Troubleshooting Common Issues
Problem: Mixture Too Soft
- Cause: Warm ingredients or insufficient chilling
- Solution: Additional refrigeration time
- Prevention: Keep ingredients cold
Problem: Chocolate Seizing
- Cause: Water contact or overheating
- Solution: Start over with new chocolate
- Prevention: Use proper melting techniques
Problem: Uneven Coating
- Cause: Improper temperature or technique
- Solution: Adjust chocolate consistency
- Prevention: Maintain proper temperatures
Nutritional Information and Dietary Considerations
Standard Recipe (per ball)
- Calories: 245
- Fat: 17g
- Carbohydrates: 20g
- Protein: 6g
- Sugar: 15g
Dietary Modifications
- Gluten-Free Version
- Use GF graham crackers
- Check all ingredients for certification
- Consider alternative crumb bases
- Lower Sugar Option
- Use sugar alternatives
- Reduce powdered sugar
- Choose dark chocolate coating
- Dairy-Free Adaptation
- Use dairy-free cream cheese
- Choose dairy-free chocolate
- Adjust consistency as needed
Serving Suggestions
Presentation Ideas
- Party Display
- Use tiered stands
- Create color themes
- Add coordinating decorations
- Gift Packaging
- Mini cupcake liners
- Decorative boxes
- Cellophane bags
- Dessert Table Integration
- Coordinate with other desserts
- Create height variation
- Add descriptive labels
Frequently Asked Questions
- Can I use natural peanut butter? Not recommended due to oil separation
- How long do they keep? Up to 1 week refrigerated, 3 months frozen
- Can I make them ahead? Yes, excellent for make-ahead preparation
- Why is my chocolate not setting? Usually due to improper temperature or ratio
Recipe Tags
#NoBake #Cheesecake #PeanutButter #DessertBalls #EasyDessert #MakeAhead #PartyFood #Chocolate #CreamCheese #HomemadeTreats
Conclusion
These No-Bake Peanut Butter Cheesecake Balls are more than just a dessert – they’re a versatile treat that combines beloved flavors in a perfectly portioned package. Whether you’re an experienced baker or just starting out, this recipe provides the perfect balance of ease and impressive results. Remember to take your time with each step, keep your ingredients at the right temperature, and most importantly, have fun with the creative possibilities these delightful treats offer.

